
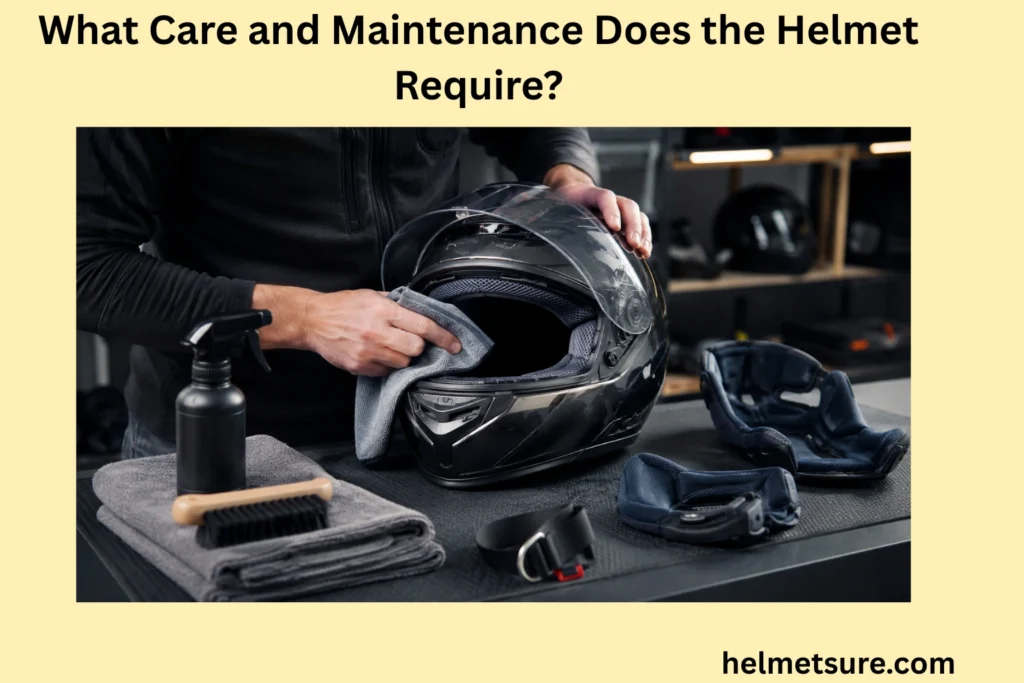
What Care and Maintenance Does the Helmet Require?
Helmet care and maintenance preserve cleanliness, fit, component function, and observable condition through approved inspection, cleaning, drying, and storage, while structural damage, significant impact, recalls, or manufacturer-defined retirement conditions require safety evaluation or replacement rather than routine care.
A useful maintenance routine therefore does more than improve appearance. It creates repeated opportunities to notice changes in the shell, protective liner, comfort padding, straps, anchors, buckles, fit system, vents, and approved accessories. It also keeps dirt, sweat, moisture, heat, chemicals, and poor storage from becoming avoidable sources of wear.
The exact procedure is product-specific. A bicycle helmet with removable comfort pads, a motorcycle helmet with a fixed interior assembly, and an industrial helmet with a shell-and-suspension system may require different cleaning, inspection, and component-handling methods. Always identify the manufacturer, model, instructions, and intended use before applying general advice.
Helmet Maintenance as Safety Preservation Rather Than Cosmetic Upkeep
Helmet maintenance preserves cleanliness, intended fit, component function, and observable condition, but cosmetic upkeep alone does not establish that the helmet remains structurally safe.
Care is best understood as a cycle: inspect the assembled helmet, clean only by approved methods, dry it fully, store it without avoidable stress, and escalate anything outside ordinary servicing. This cycle preserves observable condition and helps the owner recognize when maintenance is no longer the appropriate response.
How routine maintenance preserves cleanliness, secure fit, component function, and observable condition
Routine helmet maintenance preserves cleanliness, secure fit, component function, and observable condition by reducing contamination and identifying changes before they become normalised through continued use.
Sweat, dust, mud, road film, oils, and other residues can collect on wearer-contact surfaces, strap webbing, vents, closures, and exterior finishes. Approved cleaning removes that contamination without intentionally changing the helmet’s construction. At the same time, handling the helmet provides a chance to notice frayed webbing, a buckle that no longer closes consistently, loosened fittings, compressed comfort padding, or changes in the shell or protective liner.
Routine adjustment also helps preserve the intended wearer interface, but only through controls designed for that purpose. A cradle dial, strap slider, buckle, or manufacturer-approved pad set may be serviceable; a structural liner, anchor, or bonded shell component is not automatically user-serviceable. If the helmet feels different after cleaning, component removal, long storage, or normal use, check whether the helmet still fits correctly rather than treating tighter adjustment as the answer to every change.
Maintenance supports observation and function. It does not certify that unseen protective structures remain intact.
Why a clean-looking helmet can still have safety-relevant damage
A polished exterior can coexist with a compressed energy-absorbing liner, a separated internal layer, a damaged anchor, a buckle that closes unreliably, or a history of significant impact. Conversely, a superficial mark does not automatically prove structural failure. The importance of an observation depends on the affected component, the helmet design, the event that caused it, and the manufacturer’s criteria.
This is why appearance should be treated as evidence to inspect, not as a pass/fail test. Petzl’s inspection guidance for its professional helmets, for example, separates product-history review from checks of the shell, liner, harness, adjustment system, chin strap, comfort foams, and accessories. That model-specific process illustrates how several component groups contribute to a condition decision.[1]
When appearance and history raise different questions, inspect the helmet’s current condition and use the manufacturer’s instructions for the specific model. “Looks fine” describes only what is visible; it does not establish post-impact or structural integrity.
Where routine care ends when structural integrity becomes uncertain
Routine helmet care ends when structural integrity becomes uncertain because cleaning, drying, storage, or adjustment cannot restore or verify compromised protective structures.
Routine care can remove residue, dry approved removable parts, reposition intended adjustments, and replace components the manufacturer expressly identifies as serviceable. It cannot reverse liner compression, confirm the strength of a cracked shell, validate a damaged anchor, or prove that a helmet remains within its tested configuration after an unauthorized alteration.
The boundary is reached when an observation cannot be resolved by the manual: unexplained deformation, separation between structural layers, a significant impact, an unreliable retention component, unknown exposure to a chemical, or an uncertain service history. At that point, set the helmet aside and seek manufacturer guidance or follow applicable retirement instructions. Do not use adhesive, filler, heat, sewing, drilling, substitute hardware, or other improvised work to make a structural concern appear corrected.
When Should Manufacturer Instructions Override Generic Helmet-Care Advice?
Manufacturer instructions should override generic helmet-care advice whenever cleaning, component removal, servicing, repair, impact response, or replacement depends on the helmet’s specific materials and construction.
Generic advice can establish a conservative workflow, but it cannot identify every material, coating, adhesive, hidden attachment, removable part, temperature limit, or retirement rule. The manufacturer’s current manual or official support guidance is the controlling source for the actual product.
Why approved cleaning methods can differ by shell, liner, padding, and finish
Approved helmet-cleaning methods can differ because shell materials, energy-absorbing liners, comfort padding, adhesives, coatings, and surface finishes respond differently to moisture, chemicals, abrasion, and heat.
One helmet may permit a damp cloth and a specified mild soap on its shell, while another manual may prescribe a different agent or prohibit immersion. Removable textile pads may have instructions that do not apply to bonded foam, coated visors, reflective elements, or strap hardware. Even a cleaner that leaves no visible mark can be unsuitable if its compatibility with the underlying plastic, foam, adhesive, coating, or webbing is unknown.
For a scoped example, Giro’s bicycle-helmet care guidance recommends a damp cloth and mild soap for the shell and padding, followed by air drying away from direct heat and sunlight; it also warns against machine washing, submersion, solvents, and harsh detergents.[2] Those instructions illustrate a care approach for Giro cycling helmets, not a universal formula for every helmet. Use the actual product instructions before choosing water exposure, detergent, disinfection, or pad-cleaning methods.
How removable liners, pads, visors, and fit systems can require model-specific handling
Removable liners, pads, visors, and fit systems require model-specific handling because removal methods, cleaning permissions, attachment systems, and compatible replacement parts vary between helmets.
“Removable” should be confirmed in the manual, not inferred because a component flexes or has a visible edge. A comfort pad may be retained by tabs or hook-and-loop patches, a visor may use indexed fasteners, and a fit cradle may have hidden anchors. Pulling the wrong part can tear an attachment, disturb the intended spacing, or damage a component that was not designed for routine removal.
Before disassembly, identify which pieces the manufacturer calls user-removable, how they are released, whether each may be washed, and how orientation and attachment must be restored. Keep small fasteners and left/right components organized. After reinstallation, confirm that nothing blocks a buckle, vent, strap path, adjustment mechanism, or intended seating surface. A part that seems to snap back into place is not necessarily installed correctly.
When repair, replacement-part, service-life, or post-impact instructions must come from the manufacturer
These decisions depend on facts generic maintenance advice does not possess: the model’s materials, tested assembly, impact-management concept, approved parts, manufacturing date, inspection criteria, and retirement policy. A warranty period concerns commercial coverage; it is not automatically the product’s service life. Likewise, a generic age rule cannot replace a manufacturer-defined lifetime, and a visual check cannot replace model-specific post-impact guidance.
The manufacturer must also identify whether a damaged component is field-replaceable. Some comfort pads, visors, or accessories may be approved spares, while damaged retention anchors, energy-absorbing liners, shells, or bonded structures may require retirement of the whole helmet. When a safety authority issues a recall or remedy, that official action also overrides ordinary care.
How Should the Helmet Be Inspected for Wear or Damage?
A helmet should be inspected for visible wear, deformation, component damage, and changes in fit before routine maintenance is treated as sufficient.
Inspect under good light with the helmet clean enough to see relevant surfaces. Compare what you observe with the manual and, where useful, with prior photographs or the helmet’s known history. Do not dismantle bonded structures or use destructive methods to inspect hidden areas.
How cracks, dents, deformation, or unusual surface changes can signal shell damage
Look over accessible exterior surfaces, edges, openings, attachment regions, and areas associated with a known event. Warning observations can include cracking, a changed contour, a sharp depression, splitting, delamination, heat distortion, softening, bubbling, or an unusual finish change. The relevant signs vary with shell material and construction, so do not create a personal rule that a crack below a certain length or a dent below a certain depth is acceptable.
Separate observation from judgment. Record where the change appears, whether it followed an impact, chemical exposure, heat, or crushing, and whether it is progressing. Then apply the manufacturer’s criteria. A scuff may be cosmetic in one circumstance; a visually similar mark associated with an impact or altered structure may demand a different response. Exterior appearance alone cannot quantify remaining protection.
How compression, separation, or deterioration inside the helmet can indicate liner damage
Compression, separation, cracking, crumbling, or other deterioration inside a helmet can indicate liner damage that routine cleaning or padding adjustment cannot correct.
Inspect only the protective material that can be viewed without unauthorized disassembly. Look for a permanent depression, missing material, cracks, crumbling, separation from adjacent structures, heat deformation, or a newly uneven internal profile. Compare corresponding areas where the design is symmetrical, but do not force, flex, probe, peel, or remove a structural liner simply to investigate it.
Keep the terminology precise. The protective or energy-absorbing liner is a structural component in many helmet designs; the soft comfort pad touching the wearer may be removable and is not automatically the impact-management layer. Replacing a comfort pad does not repair damage beneath it. If the protective liner is questionable, stop routine cleaning or adjustment and follow the manufacturer’s evaluation or replacement direction.
How frayed straps, damaged anchors, or unreliable buckles can affect secure fastening
Frayed straps, damaged anchors, unreliable buckles, or malfunctioning retention hardware can prevent a helmet from maintaining the secure fastening intended by its design.
Follow the entire retention path. Examine accessible webbing for cuts, fraying, abrasion, stiff or melted areas, pulled stitching, contamination, and unusual stretching. Check anchors and routing points for movement or damage. Operate the closure and intended adjusters to confirm that they engage consistently and hold their set position without sticking, slipping, or releasing unexpectedly.
Inspection does not authorize repair. Do not knot, sew, glue, heat-seal, splice, or substitute buckles or webbing unless the manufacturer specifically supplies an approved procedure and compatible part. If a problem appears, check whether the retention system still fastens securely and apply the model-specific servicing or replacement instructions.
How loose, missing, or damaged fitted components can change the helmet’s intended configuration
Loose, missing, or damaged fitted components can change a helmet’s intended fit, coverage, retention, ventilation, or protective configuration depending on the component’s function.
Check approved visors, pads, covers, cradles, suspension pieces, edge trim, vents, fitted lights, communication mounts, face shields, and other model-specific parts named in the manual. Confirm that required pieces are present, oriented correctly, and attached at their intended points. A loose comfort pad may change the contact interface; a damaged cradle can alter positioning; a displaced strap divider can change routing; and a missing structural or retention part may be safety-critical.
Do not decide that a part is optional from appearance alone. Identify it in the manufacturer’s parts diagram or instructions. If an attachment or accessory interacts with other gear, confirm equipment compatibility before continuing use.
Pre-Use Helmet Inspection Checklist
This checklist helps organize observations; it is not a structural certification. A significant impact, recall, unknown history, or model-specific retirement condition can still require action even when none of these checks reveals obvious damage.
How Should Dirt, Sweat, and Surface Contamination Be Removed?
Dirt, sweat, and surface contamination should be removed using cleaning methods approved for the helmet’s materials, finishes, padding, and removable components.
Start with the least aggressive approved method. Work by component, keep cleaning fluid away from areas the manual says must remain dry, and avoid saturating hidden structural interfaces. If the contaminant is chemically unknown or potentially incompatible, pause rather than spreading it through the helmet.
How manufacturer-approved cleaning methods protect the shell and surface finish
Manufacturer-approved cleaning methods protect the helmet’s shell and finish by limiting exposure to chemicals, abrasion, moisture, or processes that the product was not designed to tolerate.
Use the cleaner, concentration, cloth or brush type, water exposure, and rinsing method specified for the product. Remove loose grit before wiping so particles do not become an abrasive. Apply light pressure, especially around labels, coatings, graphics, openings, and bonded edges. If the manual gives no permission for soaking or pressure washing, do not assume either is acceptable.
Official instructions may be narrow. The 3M user instructions for specified hard-hat models direct users to clean the shell and suspension with mild soap and warm water and warn against strong solvents; that advice belongs to the covered 3M products.[3] Giro’s damp-cloth guidance is likewise scoped to its cycling helmets.[2] These examples reinforce the authority of product instructions rather than creating a universal recipe.
How removable pads or liners should be cleaned only when their design permits removal
Removable pads or liners should be taken out for separate cleaning only when the helmet’s design and manufacturer instructions explicitly permit their removal and reinstallation.
First identify whether “liner” means a removable comfort liner or a structural impact-management liner. Remove only user-serviceable pieces and follow the specified hand-wash, machine-wash, wipe-clean, detergent, water-temperature, and drying directions. Do not peel away bonded foam or assume that every textile-covered component can be submerged.
Before removal, note the pad orientation and attachment pattern. After cleaning and complete drying, reinstall each component at the correct anchor, tab, pocket, or fastener. Confirm that pads lie flat, do not obstruct retention hardware or vents, and have not shrunk, torn, or lost an attachment. If reinstallation is uncertain, consult the manual rather than forcing the part.
How sweat and residue should be removed from straps and contact surfaces without damaging their materials
Sweat and residue should be removed from helmet straps and contact surfaces using material-compatible methods that preserve fastening, texture, stitching, and attachment integrity.
Follow the manufacturer’s directions for spot cleaning, wiping, rinsing, or washing the specific webbing and contact materials. Use gentle mechanical action and keep buckles, anchors, adjustment hardware, and non-removable connections within any stated water-exposure limits. Remove cleaner residue when the instructions call for rinsing, then allow all affected parts to dry fully.
Cleaning is also an inspection opportunity. If webbing remains unusually stiff, discolored, frayed, cut, or stretched, or a buckle and slider no longer operate predictably, stop treating contamination as the only issue. Cleaning cannot restore worn fibers, pulled stitching, damaged anchors, or faulty closure hardware.
Why unapproved solvents, harsh chemicals, or abrasive methods can be inappropriate for helmet materials
Potential incompatibility is not always visible immediately. A substance may affect a finish, soften or embrittle a polymer, disturb an adhesive, remain trapped in a foam, or alter webbing without producing an obvious surface warning. Abrasive pads and aggressive scrubbing can also remove coatings, labels, or material.
Do not improvise with fuel, degreaser, paint thinner, concentrated disinfectant, bleach, adhesive remover, polish, or another household or industrial chemical unless the manufacturer expressly approves it for that helmet and component. “Natural,” “gentle,” and “mild” are marketing descriptions, not compatibility evidence. If the helmet has been exposed to an unknown chemical, record the substance if possible, isolate the helmet from further exposure, and ask the manufacturer how to proceed.
How Should the Helmet Be Dried After Cleaning or Heavy Sweating?
A helmet should be dried using the manufacturer-approved method, typically by allowing retained moisture to leave without exposing heat-sensitive materials, adhesives, foams, or plastics to damaging temperatures.
Drying is a separate maintenance stage, not the final seconds of cleaning. Water can remain in textiles, foam-backed comfort pads, webbing folds, vents, pockets, and hardware even after the exterior looks dry.
How air drying allows liners, straps, and padding to release retained moisture
Air drying allows helmet liners, straps, and padding to release retained moisture gradually without intentionally adding the high heat that can threaten heat-sensitive materials.
Place the helmet in the orientation and location the manufacturer recommends, with permitted removable parts separated if that improves airflow. A dry, ventilated area generally allows moisture to leave while avoiding the concentrated heat of a clothes dryer, hair dryer, radiator, oven, heater, or hot vehicle. Giro’s cycling-helmet guidance, for example, specifies air drying away from direct heat and sunlight.[2]
Do not promise a fixed drying time. Humidity, air movement, temperature, pad thickness, strap construction, and how wet the components became all affect the result. Judge dryness across seams, folds, pad backing, and contact surfaces, not only at the shell.
Why excessive heat can affect adhesives, foams, plastics, or other helmet materials
Direct heating can concentrate temperature in a small area, while a closed vehicle or storage space can expose the whole helmet. Depending on the construction, heat may change shape, surface finish, bonding, padding, or other material properties. There is no single universal failure temperature across helmet categories, and an owner cannot reliably infer a safe limit from touch.
Avoid using heat to accelerate drying, reshape the shell, soften an attachment, or “restore” compressed material. If the helmet has been left in conditions outside the manufacturer’s stated limits or shows warping, softening, bubbling, separation, or another change afterward, discontinue routine care and request product-specific guidance.
How complete drying before storage reduces trapped moisture and persistent odor
Complete drying before storage reduces the amount of retained moisture enclosed around helmet padding, straps, and interior contact surfaces and helps limit persistent odor from damp storage.
Before putting the helmet into a bag, cabinet, locker, case, or other enclosure, check the deepest accessible textiles and overlapping areas. Refit removable pads only after both the pads and helmet interior are dry, unless the manufacturer directs otherwise. Closing damp components together can slow evaporation and allow odor-producing residue to remain concentrated.
If odor persists after approved cleaning and drying, do not mask it with unapproved fragrance, solvent, deodorizer, or coating. Recheck whether a removable component can be cleaned or replaced with an approved part. Persistent odor accompanied by visible deterioration, chemical exposure, or material change is a condition question, not merely a hygiene problem.
How Should the Helmet Be Stored Between Uses?
A helmet should be stored in a dry, stable location away from damaging heat, prolonged environmental exposure, crushing loads, and contaminants that the manufacturer warns against.
Good storage preserves the condition achieved through inspection, cleaning, and drying. It does not require an elaborate container; it requires control of moisture, temperature, light, physical loading, and incompatible substances according to the product instructions.
How a dry, ventilated location limits moisture accumulation during storage
A dry, ventilated storage location helps prevent retained moisture from remaining trapped around helmet padding, straps, and internal contact surfaces between uses.
Allow a recently used or cleaned helmet to dry before enclosing it. If the manufacturer supplies a storage bag or case, determine whether it is intended for a fully dry helmet and whether vents, visors, electronic accessories, or removable padding need separate handling. A case can protect against dust and impact during transport while still being inappropriate for sealing up damp equipment.
Choose a location where the helmet will remain dry and where normal air movement is not blocked by wet clothing or tightly packed gear. In humid conditions or after repeated wet use, check the helmet between sessions rather than assuming the outer shell reflects the moisture level inside. There is no single storage-container rule for every design.
Why excessive heat and prolonged sun exposure may accelerate material deterioration
Excessive heat and prolonged sun exposure may accelerate deterioration in certain helmet plastics, foams, adhesives, coatings, and fabrics, making manufacturer storage limits the safest reference.
Avoid leaving the helmet where it can experience uncontrolled heat or prolonged ultraviolet exposure, such as on a vehicle dashboard, beside a heater, or in direct sun for storage. A helmet designed for outdoor use still should not be assumed suitable for indefinite sun exposure when it is not being worn.
If storage exposure has produced fading, brittleness, softening, warping, bubbling, adhesive separation, or an unusual odor or texture, do not treat the problem as cosmetic by default. Note the exposure history and consult the manufacturer. Never attempt to reverse deformation with heat, pressure, or reshaping.
How crushing, heavy loads, or unstable placement can deform helmet components
Crushing, heavy loads, or unstable storage can deform helmet components or damage fitted parts, so the helmet should be stored where its shape and configuration are not subjected to unnecessary physical stress.
Do not place heavy equipment on the crown, wedge the helmet into an undersized compartment, use it as a container, or balance it where a fall is likely. Protect projecting visors, face shields, vents, peaks, adjustment dials, rails, and approved accessories according to their instructions. Secure storage during transport so the helmet does not repeatedly strike hard objects.
If a load, fall, or crush event changes the contour, creates a dent, dislodges a part, or makes the fit or closure behave differently, return to inspection. Pushing a shell back into shape, compressing a liner to restore clearance, or forcing a fitted component into place does not verify that its construction remains intact.
Why contaminated or chemically exposed storage areas can create avoidable material risks
Store the helmet separately from leaking containers, chemical-soaked rags, open adhesive or paint products, battery leakage, fuel vapors, and surfaces carrying unknown residue. Chemical transfer can occur through direct contact, splashes, or contaminated hands and equipment. A closed locker or vehicle compartment does not make incompatible substances harmless.
When exposure occurs, do not neutralize it with another chemical or scrub aggressively. Identify the substance, affected component, contact duration if known, and any material change. Follow the manufacturer’s contamination guidance. If compatibility or structural effect cannot be resolved, set the helmet aside rather than resuming normal storage and use.
Which Helmet Adjustments and Component Servicing Are Appropriate?
Appropriate helmet adjustment and component servicing are limited to actions the helmet was designed to allow, using compatible parts and preserving the manufacturer’s intended fit and configuration.
The presence of a fastener or movable piece does not automatically authorize user repair. Appropriate service is defined by the manual: intended adjustment controls, approved removable components, specified replacement parts, and documented installation procedures.
How straps and fit systems should be adjusted only within their intended range
Helmet straps and fit systems should be adjusted only within their intended range so the helmet maintains the secure positioning and fastening specified by its design.
Use the helmet’s own dial, slider, divider, ratchet, cradle, headband, buckle, or other documented control. Keep webbing routed through the intended hardware and confirm that adjusters hold their position. Do not add knots, extra holes, improvised padding, spacers, cable ties, tape, or substituted hardware to obtain more range.
Adjustment can accommodate the range designed into a correctly selected model, but it cannot correct the wrong helmet size, a deformed shell, missing pads, a damaged cradle, or a compromised retention system. If the intended controls reach their limit without achieving stable positioning, reassess the size, model, component condition, and manufacturer instructions instead of modifying the assembly.
When worn removable pads or approved accessories may require manufacturer-compatible replacements
Worn removable pads or approved accessories should be replaced only with components the manufacturer identifies as compatible with the helmet’s model, fit system, and intended configuration.
A serviceable part may need replacement when it no longer attaches correctly, has torn or compressed beyond the manufacturer’s criteria, cannot be cleaned as directed, or no longer performs its documented function. Use the exact model, size, revision, attachment method, and part number where the manufacturer provides them. Confirm whether the replacement changes pad thickness, coverage, clearance, ventilation, or interaction with the retention system.
An accessory approved for one shell size or model generation may not be approved for another. Physical installation is only one compatibility check; the manufacturer must establish that the part belongs in the configuration. Retain installation instructions and verify that every anchor, tab, fastener, and adjustment operates after service.
Why damaged buckles, retention hardware, or structural components should not be improvised with unapproved repairs
A buckle that appears simple may have defined geometry, material, routing, and load paths. An anchor can be embedded or connected to parts that are not visible. Shells and protective liners may depend on material continuity, thickness, bonding, and shape. Sewing webbing, gluing a crack, filling a liner void, heating a shell, or fitting an approximate closure can therefore change more than appearance.
For example, the user instructions for covered 3M hard hats prohibit alterations or modifications to the shell or suspension and direct replacement after specified impact conditions.[3] That product-specific rule should not be recast as a universal repair procedure; it demonstrates why servicing authority comes from the actual manufacturer. When a safety-critical part is damaged and no approved service is documented, replacement or manufacturer-directed evaluation—not improvisation—is the appropriate path.
How replacement parts should preserve the helmet’s intended compatibility and configuration
Helmet replacement parts should preserve the model’s intended compatibility, fit, attachment method, and configuration rather than merely matching the approximate shape of the original component.
Verify the manufacturer, product family, model, shell size, revision, and intended position. Then confirm that the supplier and part identification match official documentation. Install the component only by the provided procedure, without enlarging holes, trimming material, adding adhesive, altering anchors, or changing strap routing unless expressly instructed.
After installation, inspect the complete system: the part must be secure, the helmet must seat as intended, closures and adjusters must operate, required clearances must remain, and other approved equipment must not be displaced. A substitute can look identical yet use a different material, thickness, stiffness, attachment, or geometry. “It fits” and “it is approved for this helmet” are different conclusions.
Which Care Practices Can Damage or Compromise the Helmet?
Helmet-care practices can become damaging when they expose the product to incompatible chemicals, excessive heat, structural modification, or unapproved replacement parts.
The highest-risk mistakes often begin as attempts to clean faster, dry sooner, customize appearance, improve comfort, or extend service. The safer boundary is simple: do not add a process, substance, alteration, or component that the manufacturer has not approved for the relevant helmet area.
How harsh chemicals can degrade or weaken certain helmet materials
Harsh or incompatible chemicals can degrade certain helmet plastics, foams, adhesives, coatings, or fabrics, so chemical exposure should remain within the manufacturer’s approved care instructions.
Compatibility depends on both the substance and the material formulation. A solvent that affects one shell polymer may behave differently on another material, while an adhesive remover or concentrated cleaner can also reach liner, coating, label, webbing, or bonding layers. Absence of immediate discoloration is not proof that no material change occurred.
Use only substances the manufacturer names or permits for that component. Keep fuels, strong solvents, degreasers, bleach, paint products, oils, and aggressive disinfectants away unless official instructions expressly authorize a defined product and method. If accidental exposure occurs, do not conduct a home chemical test or cover the affected area; document the exposure and seek product-specific guidance.
Why drilling, cutting, painting, gluing, or altering structural areas may change intended performance
A drilled hole removes material and may create a stress concentration. Cutting can change coverage or an edge. Glue can interact with foam, plastic, or coating and can conceal damage. Paint and surface preparation can introduce solvents or abrasion. Reshaping changes geometry, and an added mount can introduce leverage or interfere with a designed surface or breakaway feature.
Approved accessory installation is different from structural modification: it uses a documented component, location, attachment, and procedure for the specific helmet. Do not assume every sticker, camera mount, light, visor, paint, or adhesive is prohibited or permitted. Check manufacturer compatibility, including placement and preparation, before applying it.
How direct high heat can deform or deteriorate protective components
Direct high heat can deform, soften, weaken, or otherwise alter certain helmet components, making uncontrolled heating an inappropriate drying or storage method unless the manufacturer specifically permits it.
Do not use an oven, clothes dryer, hair dryer, radiator, heat gun, open flame, heater outlet, or hot vehicle to speed drying or reshape the helmet. Concentrated heat can affect the shell, liner, adhesive, padding, webbing, coating, and fitted components differently. Because products use different material systems, no generic temperature claimed online should replace the manufacturer’s limit.
If heat exposure is known or suspected, allow the helmet to reach normal ambient conditions without further intervention and inspect it without forcing its shape. Any deformation, softening, separation, bubbling, unusual texture, or altered fit should be escalated. Cooling a changed component does not demonstrate that its original properties returned.
Why installing unapproved parts can interfere with fit, retention, or intended construction
Installing unapproved helmet parts can interfere with fit, retention, spacing, attachment strength, or intended construction even when the substitute appears to fit physically.
Generic pads can change how the head sits relative to the shell. A substitute buckle can alter webbing routing or closure behavior. An unapproved visor, mount, light, face shield, or communication component can obstruct adjustment, ventilation, coverage, or compatibility with other equipment. A replacement suspension or cradle can change the whole wearer interface.
Verify approval using the helmet manufacturer’s current documentation and an identifiable part source, not popularity, visual similarity, or reviews. Do not trim, shim, drill, glue, or force a substitute to make it install. If an approved part is unavailable, ask the manufacturer whether another part is compatible or whether the helmet should be retired.
Care Practices That Require a Stop-and-Check Decision
| Practice | Main concern | Appropriate direction |
|---|---|---|
| Using unapproved chemicals | Unknown material compatibility | Verify the cleaner against manufacturer guidance. |
| Drilling, cutting, or structural alteration | Changed geometry or intended configuration | Do not present or perform it as routine maintenance. |
| Applying unapproved heat | Material deformation or deterioration | Use only approved drying and storage conditions. |
| Installing unverified parts | Changed fit, retention, attachment, or configuration | Verify exact model compatibility before installation. |
| Improvised repairs | Uncertain protective or retention function | Escalate to manufacturer guidance or replacement. |
When Should the Helmet Be Replaced Instead of Maintained?
A helmet should move from routine maintenance to replacement or manufacturer-directed evaluation when damage, impact history, compromised retention, recall status, service-life guidance, or unresolved structural uncertainty makes ordinary care insufficient.
Replacement is not a response to imperfect appearance alone. It becomes appropriate when the question changes from “How do I preserve this serviceable helmet?” to “Is this protective assembly still within its approved condition?” Cleaning and adjustment cannot answer the second question.
When cracks, deformation, liner damage, or compromised retention components move the helmet beyond routine care
Cracks, structural deformation, protective-liner damage, or compromised retention components can move a helmet beyond routine care because cleaning and adjustment cannot restore verified protective integrity.
Stop and consult the manufacturer’s criteria when you find structural cracking, changed shell shape, liner crushing or separation, missing protective material, damaged anchors, unreliable closure, torn structural webbing, or another safety-critical change. The exact retirement threshold remains product-specific, but none of these concerns should be hidden, glued, filled, sewn, reshaped, or dismissed merely because the helmet can still be worn.
If the manufacturer identifies an approved component replacement, follow that procedure and recheck the whole assembly. If the affected part is not serviceable, the product cannot be identified, or the condition cannot be resolved reliably, remove the helmet from use according to the applicable guidance. Owners should not self-certify a damaged protective structure.
Why significant impact history can matter even when visible damage appears limited
Significant impact history can matter even when visible damage appears limited because helmet protective structures can be designed to manage impact energy in ways that are not fully assessable through surface appearance alone.
Record any event in which the helmet struck an object, was struck, was crushed, or was otherwise loaded beyond ordinary handling. Note whether it was worn, where contact occurred, and what the manufacturer defines as a significant impact. Then follow the model’s post-impact instructions. Different helmet categories and constructions can have different retirement or evaluation requirements.
Do not use cleaning to search for reassurance or continue using a helmet simply because no crack appears. Some manufacturers require retirement after defined impacts; others may offer inspection or product-specific guidance. Only the applicable manufacturer or safety authority can establish the correct path for that product and event.
When unresolved structural uncertainty should trigger manufacturer guidance rather than continued use
Uncertainty can arise from unknown impact history, second-hand ownership without records, missing labels, an unidentifiable model or date, suspected chemical or heat exposure, internal noise, a changed shape, unauthorized modifications, or a condition not addressed by the manual. Uncertainty is not proof of failure, but it is not evidence of safety either.
Set the helmet aside while identifying it and gathering facts. Provide the manufacturer with photographs, product markings, history, and a precise description without dismantling the structure. If reliable guidance cannot be obtained, do not resolve a safety-critical gap by guessing, comparing only exterior photos, or accepting an anonymous repair suggestion.
How manufacturer-defined service life, recalls, or replacement instructions establish product-specific retirement thresholds
Manufacturer-defined service life, official recalls, and model-specific replacement instructions establish retirement thresholds that routine cleaning, good cosmetic condition, or infrequent use do not override.
Service life may depend on manufacture date, first use, inspection status, exposure, event history, or other conditions defined by the manufacturer. It is not interchangeable with warranty length, certification date, how new the helmet looks, or a generic internet interval. Record the identifiers and dates needed to apply the actual instruction.
Recall status is a separate question. Use the manufacturer’s official notice and the relevant government recall database to match brand, model, date range, and other identifiers. In the United States, the Consumer Product Safety Commission maintains an official recalls database for products within its jurisdiction.[4] If a notice affects the helmet, follow its remedy rather than attempting routine maintenance. Check whether the helmet has been recalled whenever the model’s status is uncertain.
When Maintenance Must Become Replacement or Evaluation
| Observable or known condition | Appropriate direction |
|---|---|
| Routine dirt or sweat with no safety concern | Follow manufacturer-approved cleaning and drying instructions. |
| Worn but serviceable removable component | Verify and install a manufacturer-approved replacement. |
| Damaged strap, buckle, anchor, shell, or protective liner | Stop routine assumptions and follow manufacturer servicing or replacement guidance. |
| Significant impact history | Follow post-impact instructions; do not rely on appearance alone. |
| Unknown structural condition | Seek manufacturer guidance or discontinue use until resolved. |
| Official recall affecting the model | Follow the recall authority’s or manufacturer’s remedy. |
| Manufacturer-defined retirement condition reached | Remove the helmet from service according to the applicable guidance. |
What Routine Should Owners Follow to Keep a Helmet Properly Maintained?
A practical helmet-maintenance routine follows the same sequence each time: inspect condition, use approved cleaning methods, dry completely, store correctly, and escalate damage, impact, servicing, recall, or replacement questions to the manufacturer.
The sequence matters. Inspection determines whether routine care is still appropriate; approved cleaning removes contamination; complete drying prepares the helmet for storage; controlled storage protects its condition; and escalation prevents maintenance from being used as a substitute for structural judgment.
Inspect condition and fastening components before relying on the helmet
Inspect the helmet’s observable condition and fastening components before relying on it so visible damage, fit changes, or retention problems are identified before ordinary use resumes.
Review the helmet’s relevant history, then inspect accessible shell, protective-liner, comfort, fit, retention, and fitted components. Operate intended closures and adjusters. Confirm that required parts remain attached and that no new deformation, cracking, separation, deterioration, fraying, or unreliable hardware is evident. Compare every observation with the product instructions.
If a significant impact, damaged component, recall, unknown exposure, or structural uncertainty exists, do not reduce the decision to “it looks fine.” Set the product aside and apply the manufacturer’s post-impact, servicing, evaluation, or retirement guidance.
Clean contamination using methods approved for the helmet’s materials
Clean helmet contamination using methods approved for the product’s materials and removable components so routine hygiene does not introduce unnecessary chemical, abrasive, or structural damage.
Identify what is dirty and clean each permitted component by its own directions. Remove only user-removable parts, use specified agents and tools, avoid unapproved immersion or abrasion, and protect structural interfaces. Rinse only as directed and observe components during cleaning for defects that dirt previously concealed.
If the contaminant is chemically unknown, has affected material appearance or texture, or cannot be removed by an approved method, stop escalating the cleaning strength. More solvent, pressure, heat, or scrubbing can convert a cleanliness problem into a material or condition problem.
Dry the helmet completely and store it away from damaging conditions
Dry the helmet completely according to its care instructions and store it where moisture, excessive heat, crushing, contamination, and other avoidable environmental stresses are controlled.
Allow moisture to leave straps, seams, pad backs, and interior surfaces, not only the visible shell. Avoid uncontrolled direct heat and reinstall removable parts only as instructed. Once dry, place the helmet in a stable position that protects its shape and fitted components without trapping moisture.
Keep it away from prolonged sun, high heat, heavy loads, sharp objects, falls, and chemical contamination. Reinspect after any unusual storage or transport event rather than assuming the storage stage cannot affect condition.
Recheck manufacturer guidance when damage, impact, servicing, or replacement questions arise
Use the question to find the right authority: care instructions for cleaning and drying; parts documentation for removability and compatibility; post-impact guidance for an impact event; service-life instructions for retirement; and official notices for recalls. Preserve model identifiers, receipts or records, photographs, and a simple maintenance and event history when they help apply that guidance.
The complete routine is:
Complete Helmet Maintenance Routine