
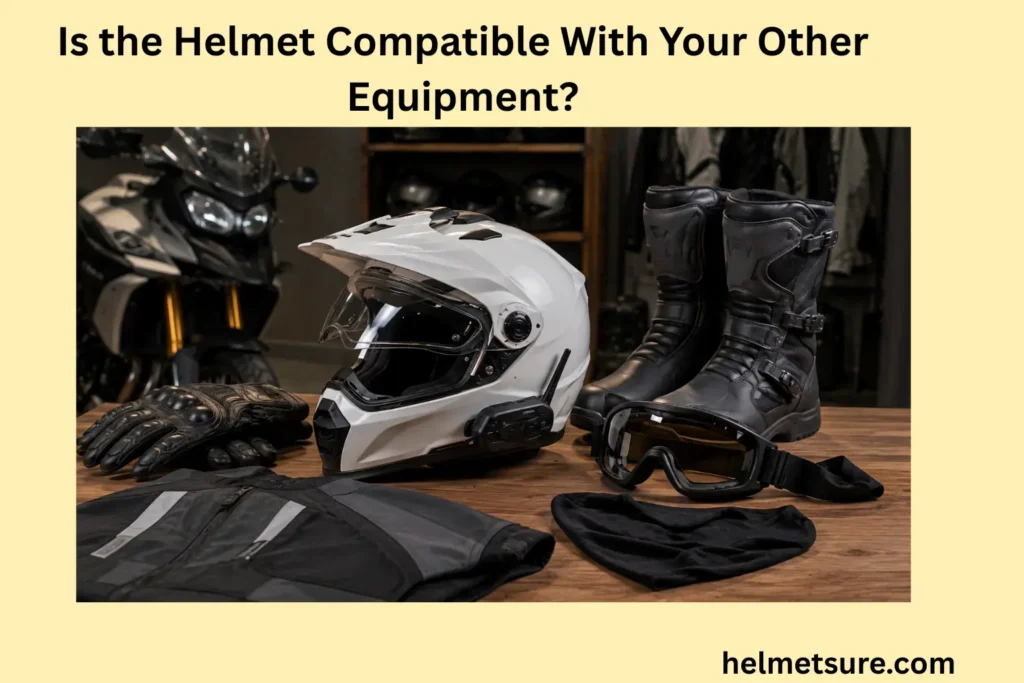
Is the Helmet Compatible With Your Other Equipment?
Helmet compatibility means the complete equipment setup preserves helmet position, retention, visibility, adjustment access, and normal movement; gear that displaces, obstructs, or destabilizes those functions requires correction or rejection.
Compatibility is a complete-system judgment. A helmet, goggles, glasses, ear protection, communications equipment, neck protection, clothing, and upper-body protection may all be wearable separately yet interfere after they are combined. The test is not merely whether everything occupies the available space. It is whether the helmet and surrounding equipment continue to perform their intended functions together.
Begin with the helmet correctly fitted on its own. Then add the equipment that will actually be used and compare the helmet's position, pressure distribution, retention routing, visibility, control access, and stability before and after each addition. Normal activity-related movement must not make the setup lift, tilt, rotate, migrate, block the view, or prevent correct fastening.
This article evaluates equipment interfaces. It does not certify the setup, guarantee injury prevention, establish impact performance, or provide universal clearances, pressure limits, movement angles, strap tensions, or acceptable displacement values. Category-specific requirements and exact-model instructions control whenever they are available.
Helmet Compatibility Means More Than Simply Being Able to Wear Everything Together
Helmet compatibility requires the complete equipment setup to work without changing the helmet's intended position, retention, visibility, movement, or adjustment.
The evaluation therefore separates physical coexistence from functional compatibility. Every later section examines an interface where equipment may appear to fit but still create a pressure point, obstruct a control, reroute retention, move eyewear, restrict the head, or displace the helmet during motion.
Physical fit versus functional compatibility
Physical fit answers only the first question: can the pieces be put on at the same time? It does not show whether the helmet remains level, the retention system stays correctly routed, eyewear remains aligned, the usable view stays clear, or the wearer can complete required adjustments. Those checks require the final equipment configuration and realistic movement.
Functional compatibility begins with a valid helmet-only baseline. NHTSA's motorcycle-helmet fitting guidance, for example, treats correct shape, size, even pressure, and resistance to movement as helmet-fit questions before any accessory interaction is evaluated. That category-specific guidance illustrates the principle without creating a universal fit test for every helmet type. [2]
If the helmet already sits incorrectly, compatibility testing cannot determine whether later movement comes from the helmet itself or the added equipment. Resolve the base helmet fit first, then test the exact equipment combination.
Why equipment can technically fit while still interfering with helmet performance
Equipment can technically fit while still interfering when it shifts the helmet, blocks adjustment, concentrates pressure, restricts movement, or changes visibility.
Interference often appears through force transfer. Eyewear arms can occupy space between the head and padding. A communication unit can overlap a strap or shell edge. A collar can press against the rear shell when the wearer looks upward. Each item may be wearable, but contact at one interface can change another component's position or operation.
Not every contact point is a failure. Incidental contact that leaves helmet position, equipment stability, required movement, visibility, retention, and comfort unchanged may be acceptable if the manufacturers do not prohibit it. Persistent contact becomes interference when it produces a functional consequence.
“Performance” here means correct in-use operation, not laboratory impact performance. The article does not infer protection from the absence of discomfort, gaps, or visible movement.
Which contact points should remain free from unwanted pressure or displacement
Helmet contact points around the eyes, temples, ears, jaw, rear shell, neck, straps, and adjustment system must remain free from pressure or displacement that changes function.
At the front, inspect the eye port, brow, glasses, goggles, and any face protection. Along the sides, check eyewear temples, ear protection, speakers, pads, and communication hardware. Below and behind the helmet, inspect the chin strap, buckle, collar, neck protection, shoulder equipment, rear shell edge, and fit controls.
Each zone has a different failure signal. Front interference may move eyewear or block the view. Side interference may create concentrated pressure or lateral helmet shift. Jaw-area interference may obstruct fastening. Rear contact may lift the helmet or restrict movement. A blocked dial, slider, or buckle may prevent the correct configuration from being maintained.
Pain is not the only criterion. A setup can fail because it displaces the helmet or obstructs retention before it becomes severely uncomfortable. Preserve the manufacturer's intended pads, liner, suspension, and strap routing; do not remove required components to create clearance.
Why compatibility should be checked with the complete equipment setup
Helmet compatibility must be checked with the complete equipment setup because individual components can interact differently after every layer is added.
A goggle may align with the helmet until a balaclava changes its strap position. A communication unit may clear the shell until a collar contacts its housing during rotation. Ear protection may fit until eyewear arms and helmet straps share the same side space. These cumulative interactions are invisible when each component is tested alone.
“Complete” means the normal configuration for the intended activity: the actual helmet, eyewear, hearing or communication equipment, face protection, neckwear, clothing, guards, and approved accessories that will be used together. Unrelated optional equipment does not need to be added.
Install and don equipment according to the relevant manufacturer sequence. If an OEM prohibits a combination, the test stops there; comfortable coexistence cannot override the prohibition.
Physical Fit Versus Functional Compatibility
| Observation | Fits Together Only | Functionally Compatible |
|---|---|---|
| Equipment can be put on | Yes | Yes |
| Helmet position remains unchanged | Not established | Required |
| Retention remains correctly usable | Not established | Required |
| Visibility remains acceptable | Not established | Required |
| Normal movement remains available | Not established | Required |
| Adjustments remain accessible | Not established | Required |
| Full setup passes movement testing | Not established | Required |
Which Helmet Interfaces Need to Remain Clear for Other Equipment to Fit Correctly?
Helmet interfaces around the eyes, temples, ears, jaw, rear shell, neck, straps, and adjustment system need enough functional clearance for surrounding equipment to work without interference.
Functional clearance does not require a universal visible gap. It means that the exact components can occupy their intended positions without forcing displacement, obstructing required operation, or restricting normal movement. Manufacturer-defined gaps, overlap rules, mounting points, and routing instructions take priority where they exist.
Eye-port and brow clearance around the front of the helmet
Check whether the upper edge of goggles or glasses presses against the brow opening, whether the helmet pushes the eyewear down or away from the face, and whether either item overlaps the other strongly enough to change position. Then inspect the usable view in the posture required for the activity.
Close alignment can be normal. A visible gap can also be acceptable. Geometry varies among bicycle, motorcycle, snow, tactical, industrial, climbing, and other helmet-and-eyewear systems, so the article does not prescribe a standard brow-to-goggle distance.
The interface fails when the combined position materially blocks the view, destabilizes the eyewear, or moves the helmet. The dedicated helmet field of vision evaluation covers visibility more fully; this section asks whether other equipment changes it.
Temple and ear-area clearance along the helmet sides
Temple and ear-area clearance must prevent surrounding equipment from creating concentrated pressure or pushing the helmet away from its normal position.
Glasses arms, earplugs, earmuffs, headphones, speakers, cables, boom microphones, and communication housings can add thickness beside the head or shell. Check whether that thickness compresses intended fit surfaces, creates a local hot spot, shifts the helmet sideways, or moves the accessory out of position.
Purpose-built recesses, pockets, rails, and accessory slots may provide a documented installation pathway. They are model-specific rather than proof that any device will fit. Petzl and 3M, for example, identify particular accessory systems for particular industrial helmet families; those scoped examples reinforce the need to verify the exact helmet-accessory pairing. [3][4]
Do not cut the liner, remove required padding, or permanently compress components to create room. If an approved configuration cannot preserve both the helmet position and accessory function, the combination remains unresolved or incompatible.
Chin strap, buckle, and jaw-area clearance
Chin strap, buckle, and jaw-area clearance must keep the helmet's retention system correctly positioned, fastenable, and unobstructed.
Inspect where collars, face coverings, guards, goggle straps, ear equipment, microphone booms, and cables approach the retention path. Adjacent placement may be harmless; overlap becomes a conflict when it pushes a strap away from its prescribed route, blocks the buckle, changes stable contact, or prevents required adjustment.
Reachability and correctness are separate. The wearer may be able to touch a buckle that still cannot be fully engaged, verified, or released as required. Test access with the normal gloves and coverings where relevant, while stationary.
Do not reroute straps around another item unless the exact helmet instructions authorize that route. A retention system that cannot be fastened and adjusted as instructed automatically fails the compatibility check.
Rear-shell and neck-area clearance
Rear-shell and neck-area clearance must allow normal helmet position and head movement without collars or neck equipment forcing the helmet upward or forward.
Static fitting can miss this interface. A collar may sit just below the shell until the wearer rotates, looks upward, lowers the chin, or adopts the activity posture. Observe whether contact remains incidental or transfers enough force to lift, tilt, or push the helmet.
Contact is not automatically interference. Some designs permit surfaces to touch while position and required movement remain unchanged. The failure signal is the consequence: repeated helmet displacement, blocked normal movement, destabilized surrounding equipment, or a manufacturer-prohibited interaction.
There is no universal rear clearance measurement. Test the actual helmet and lower equipment through the movement required for the intended use.
Adjustment-dial and retention-system access
Adjustment-dial and retention-system access must remain available after surrounding equipment is fitted.
Identify every control the wearer must set or verify: a dial, band, slider, cradle position, strap adjuster, buckle, chin cup, suspension control, or another category-specific mechanism. After all equipment is on, confirm that the manufacturer's fitting procedure can still be completed.
Blocked access can prevent a correct setting from being established or checked. Difficult reach is not always failure, but an obstruction that makes a required adjustment unavailable is unresolved until the configuration changes.
Do not add unauthorized extensions, replacement adjusters, or improvised hardware. Adjustment access means the approved system remains usable; it does not mean controls should be operated while moving when the activity or manufacturer instructions make that unsafe.
Helmet Interface Clearance Checks
| Interface Zone | Check | Pass Signal | Conflict Signal |
|---|---|---|---|
| Eye port / brow | Eyewear alignment and usable view | Position remains normal | Forced overlap or blocked view |
| Temples / ears | Added equipment thickness | No displacement | Concentrated pressure or lateral shift |
| Jaw / buckle | Strap and buckle routing | Correct fastening remains possible | Obstruction or rerouting |
| Rear shell / neck | Contact during movement | Position remains stable | Helmet lifts or movement is restricted |
| Adjustment system | Access after all gear is fitted | Normal adjustment remains possible | Dial, slider, or buckle is blocked |
How Should Goggles and Protective Eyewear Fit With the Helmet?
Goggles and protective eyewear fit compatibly with a helmet when both remain correctly positioned without concentrated pressure, unstable overlap, or material loss of visibility.
Eyewear is an active interface rather than a passive accessory. Evaluate temple pressure, frame or goggle alignment, position after the helmet is fitted, stability through movement, strap interaction, and the combined usable view as separate checks.
How eyewear temples should sit without creating concentrated pressure points
Fit the eyewear in its normal stable position, then put on and secure the helmet as instructed. Check whether the arms remain level and seated rather than being driven upward, inward, outward, or forward. Observe both local discomfort and any change in helmet position.
Normal contact with padding can be compatible. Concentrated pressure becomes a conflict when it persists, becomes painful, moves the frame, or shifts the helmet. Prescription frame geometry and individual head shape can change the result, so no universal pressure or wear-time threshold applies.
If the helmet offers documented eyewear channels or approved inserts, use only the specified configuration. Do not carve, compress, or remove helmet material to create a channel.
Whether goggles align with the helmet opening without excessive gaps or overlap
Goggles should align with the helmet opening without overlap or separation that displaces either component or contradicts manufacturer fitting guidance.
Inspect the top edge, side edges, nose area, and goggle strap path. The frame should sit in its intended facial position while the helmet remains in its established position. A forced overlap that pushes goggles downward, lifts the helmet, breaks the seal where one is required, or changes the usable view is a functional conflict.
Alignment is not a cosmetic contest. A small visible gap can function correctly, while a visually seamless pairing can still create leverage or blocked visibility. Helmet and goggle geometries differ, and only manufacturer documentation can establish a required gap or overlap for a specific pairing.
Judge the exact components in the intended posture rather than relying on photos of a similar setup.
How helmet padding can push glasses out of their normal position
Helmet padding can push glasses out of their normal position when frame geometry occupies space the helmet's fit system was not designed to accommodate.
Watch for glasses moving upward, forward, sideways, or away from the face after the helmet settles. Compare lens position, nose-pad contact, temple seating, and visual alignment before and after the helmet is fitted.
Temporary movement during donning is not necessarily a failure if the eyewear returns to its normal stable position. Persistent displacement indicates that padding, the shell opening, straps, or another component is competing for the same space.
Do not assume that compressing padding is harmless or that tighter retention will solve the geometry. Preserve the approved interior configuration and try a documented eyewear-compatible setup or a different helmet-eyewear pairing if the conflict remains.
Whether goggles remain stable when the helmet moves with the head
Goggles remain compatible only when normal head movement does not cause the helmet-goggle interface to lift, rotate, or repeatedly shift the eyewear.
After static alignment passes, rotate, raise, lower, and tilt the head through the normal activity movement. Observe whether the goggle frame migrates, the strap slides, the helmet catches the frame, or repeated contact moves either component.
One-time settling can be normal. Continued migration after the equipment is correctly secured is not. Do not tighten a goggle strap simply to overpower incompatible geometry; excessive tension can create new pressure or helmet-position problems without resolving the interface.
Use the strap route and attachments specified for the exact goggle and helmet. A stable result applies only to the tested wearer, equipment, and configuration.
How to check that eyewear does not reduce peripheral visibility
Eyewear compatibility requires checking that helmet and eyewear positioning does not materially obstruct the peripheral view needed for the intended activity.
First observe the helmet-only view, then add the eyewear and complete setup. Look for new obstruction from frame edges, displaced lenses, goggle foam, straps, face protection, a brow overlap, or another component. Check in the head and eye posture normally used for the activity.
Normal equipment edges may remain visible without materially reducing function. The rejection signal is a persistent obstruction that affects the usable view required for the task. This consumer observation is not a certification or laboratory field-of-view test.
Do not publish a universal angle. Any numerical requirement must come from the applicable helmet or eyewear standard and retain its category and test context.
Compatibility check 1
Can Ear Protection, Headphones, or Communication Equipment Fit Without Disturbing the Helmet?
Ear protection, headphones, and communication equipment are compatible only when they fit without altering helmet position, required padding, retention routing, or normal control access.
Evaluate internal and external equipment separately. Internal speakers, earbuds, earplugs, and wiring interact with wearer-contact or suspension areas; external earmuffs, clamps, housings, booms, cables, and controls interact with the shell, straps, edges, mounts, and surrounding clothing.
Manufacturer-defined integration is the safest starting point. Petzl and 3M documentation illustrates how industrial helmet families can have specific attachment points and compatible accessory ranges, but those examples do not authorize the same components on another helmet. [3][4]
How added thickness around the ears can change helmet pressure
Added thickness around the ears changes helmet pressure when accessories occupy space between the head and the helmet's intended fit surfaces.
Close-fitting helmets allocate limited space around the ears and temples. Adding a speaker, earbud, eyewear arm, thick covering, or another component can compress pads or suspension, concentrate pressure, move ear protection, or push the helmet laterally.
Thin equipment is not automatically compatible. Small geometry changes can matter when the original fit is close, while a purpose-built recess can accommodate a documented component without disturbing the fit surfaces. Evaluate the exact accessory rather than judging by thickness alone.
Compare the helmet position and pressure before and after installation. If added bulk creates persistent pressure or displacement, remove or change the accessory configuration; do not cut, thin, or remove helmet components without explicit authorization.
Whether speakers or communication units interfere with internal padding
Speakers or communication units interfere with helmet compatibility when their installation displaces, removes, compresses, or bypasses required internal components outside manufacturer instructions.
Look for documented speaker pockets, cable routes, hook-and-loop zones, recesses, communication-ready components, or other approved installation features. A void visible behind a comfort pad is not automatically an authorized pocket, and removable comfort material is not necessarily expendable.
The installation passes only when required padding, the structural liner, suspension, fit system, and retention anchors remain in their intended configurations. A device that sits correctly but forces the helmet upward or creates concentrated pressure still fails.
Never carve a recess, cut an impact liner, remove required padding, or route wiring through an undocumented structural area. NHTSA warns that alterations beyond manufacturer-provided fit components can compromise helmet integrity in the motorcycle context; the exact helmet instructions remain decisive for other categories. [2]
How external communication hardware can conflict with straps or shell edges
Inspect clamps, adhesive bases, rails, brackets, control housings, boom microphones, and cables in the final position. Check whether a mount crosses a strap path, contacts the shell edge during movement, catches clothing, blocks a visor or adjustment, or adds leverage that shifts the helmet.
An apparently convenient flat surface is not proof of an approved attachment location. Use the exact helmet and communications-system mounting instructions. CPSC guidance cautions that attachments not provided with a helmet can affect its performance, which is why improvised drilling, clamping, adhesives, and adapters should not be generalized as safe solutions. [1]
If the manufacturers do not confirm the pairing or the mounted system produces interference, seek exact-model guidance or use a different approved configuration.
Whether controls remain accessible while the helmet is worn
Communication controls remain compatible when the wearer can operate required functions without displacing the helmet or compromising normal use.
With the complete equipment fitted, locate essential controls and check that gloves, collars, face protection, straps, and other components do not block them. The wearer should not need to lift, rotate, or loosen the helmet merely to reach a control.
Access does not mean every function should be operated while moving. Perform the compatibility check while stationary, and follow activity rules and manufacturer instructions for safe operating timing. A control can be physically reachable yet unsuitable for in-motion use.
If control access is optional rather than required, classify the issue as a usability limitation. If a blocked control prevents the system from being set, verified, or used as required, the configuration needs adjustment or rejection. Relevant control and mount details belong to the exact helmet features and accessory documentation.
When an accessory causes the helmet to sit higher or shift laterally
An accessory is incompatible with helmet fit when it causes the helmet to sit higher, shift laterally, or depart from the wearer's established correct position.
Fit and secure the helmet without the accessory and note its baseline position. Install the accessory exactly as instructed, refit the helmet without compensatory overtightening, and compare the brow, crown, side, and rear position.
Distinguish helmet movement from accessory movement. A speaker moving within an approved pocket is one problem; the entire helmet rising or moving sideways is a direct fit conflict. Retention tension cannot restore space that the accessory occupies between the head and helmet.
Add one item at a time so the cause remains traceable. Persistent positional change means the accessory, installation, or helmet-accessory pairing must change before use.
Communication and Ear-Equipment Compatibility
| Equipment | Helmet Contact Point | Possible Interference | Functional Consequence | Compatibility Result |
|---|---|---|---|---|
| Ear protection | Ear / side padding | Added thickness | Pressure or lateral shift | Pass / Adjust / Reject |
| Internal speaker | Padding / recess | Displaced internal component | Altered fit | Pass / Adjust / Reject |
| External communication unit | Shell / strap area | Mount or cable overlap | Strap or movement conflict | Pass / Adjust / Reject |
| Control housing | Side / rear area | Blocked access | Helmet movement during operation | Pass / Adjust / Reject |
How Does the Helmet Interact With Neck Guards, Collars, and Upper-Body Protection?
Helmet compatibility with neck guards, collars, and upper-body protection depends on whether the surrounding equipment preserves normal helmet position and required head movement.
This interface changes as the wearer rotates, looks up or down, leans, and adopts the activity posture. Evaluate the lower and rear helmet edges against the actual neck guard, brace, collar, jacket, shoulder protection, or other equipment rather than checking the helmet in isolation.
How raised collars can contact the rear or lower edge of the helmet
Raised collars can interfere with a helmet when they contact its rear or lower edge strongly enough to change helmet position or head movement.
Put on the final collar or neckwear and begin in the normal neutral posture. Note any contact, then move through the head positions needed for the activity. Observe whether the collar merely touches the shell or applies repeated upward or forward force.
Contact alone is not an automatic failure. Flexible fabric may touch without changing function, while a rigid or high collar may lift the helmet, limit rotation, or push the brow position. The consequence determines the general compatibility result unless a manufacturer specifically prohibits the contact.
Do not fold, cut, remove, or permanently deform protective clothing or helmet components simply to create space. Use an approved alternative configuration if force-producing contact remains.
Whether neck protection limits normal head rotation
Test the actual movement the user needs, such as checking surroundings, following a work task, maintaining a riding view, or completing a sport-specific action. Do not force the neck to an arbitrary extreme or turn the check into a clinical range-of-motion assessment.
Some protective systems intentionally limit certain motion. Designed restraint should be evaluated under that system's instructions rather than treated automatically as interference. The problem is an unintended restriction that prevents required function or moves the helmet.
Because relevant movement depends on the activity, use helmet intended use and both equipment manufacturers' instructions as the boundary. No universal rotation angle applies.
How shoulder protection can interfere when looking upward or sideways
Shoulder protection can interfere with the helmet when upward or sideways head movement drives the helmet against the protective equipment and changes position or movement.
Wear the complete upper-body system, secure it correctly, and reproduce the normal posture. Look upward and to each side as the activity requires. Watch the helmet's lower edge, the shoulder or collar surface, and the helmet position rather than relying only on the feel of contact.
An extreme pose irrelevant to normal use should not become the sole rejection basis. Conversely, repeated collision during required movement is a functional conflict even if the setup feels comfortable at rest.
If the shoulder equipment lifts, tilts, or rotates the helmet, change the approved equipment pairing or seek category-specific fitting guidance. Do not suppress the movement by overtightening the retention system.
Whether surrounding equipment pushes the helmet upward during movement
Surrounding equipment fails the compatibility check when normal movement pushes the helmet upward from its established correct position.
Establish and record the helmet-only position first. After adding neck and upper-body gear, repeat normal rotation, upward and downward viewing, and relevant posture changes. Compare the brow, crown, side, and rear position after each movement.
Shell contact and shell displacement are different observations. Equipment can compress while leaving the helmet unchanged, but visible or felt helmet lift shows that external force is altering the fit. No generic lift distance is needed to identify repeated departure from the established position.
Tightening the chin strap alone does not remove the external force. Persistent lift remains a rejection signal until the responsible interface is corrected.
How to distinguish normal contact from movement-restricting interference
Normal contact leaves helmet position and required movement unchanged, while movement-restricting interference alters position, blocks motion, or repeatedly forces components against each other.
Classify the interaction by observable function. If the equipment touches during normal motion but the helmet, protection, view, retention, and required movement remain stable, monitor the contact and confirm that no manufacturer restriction is violated.
If contact pushes the helmet, causes components to migrate, creates persistent pressure, blocks necessary motion, or prevents correct operation, it is interference. Adjust only through manufacturer-supported settings or select a different configuration.
“Acceptable” is conditional, not a universal approval. Exact product prohibitions override a general observation that the contact appears harmless.
Compatibility check 2
Do Helmet Straps, Buckles, or Adjustment Systems Conflict With Other Gear?
Helmet straps, buckles, and adjustment systems are compatible with other gear only when they remain correctly routed, accessible, secure, and free from interfering overlaps.
Retention compatibility deserves its own audit. Eyewear, ear protection, goggle straps, collars, face coverings, communication hardware, and clothing can all occupy the same routes or access zones as helmet fastening components.
Where helmet straps should sit relative to eyewear and ear equipment
Fit the helmet according to its manual before adding accessories. Then observe whether glasses arms, ear protection, headphones, communication components, or goggle straps cross, lift, twist, or displace the helmet straps.
There is no universal rule that one strap must always sit over or under another component. Correct routing varies by helmet and equipment design. Adjacent placement can pass; forced deviation from the prescribed path cannot.
The exact helmet retention system instructions govern strap position, fastening, and adjustment. If another item makes that routing impossible, the combination fails until an approved alternative is found.
How overlapping straps can create pressure or unwanted movement
Overlapping straps create a compatibility problem when stacked webbing produces concentrated pressure, slipping, or movement that changes helmet or accessory position.
Check every crossing among helmet straps, goggle straps, eyewear retainers, face-protection straps, and communication cables or loops. Added thickness can create a pressure point, while friction or competing tension can make one layer migrate.
Not every overlap is unsafe. A manufacturer may design a stable route where straps sit together. The warning signals are persistent local pressure, repeated sliding, loosening, twisting, or a change in helmet or accessory position.
Do not invent a stacking limit or reroute the helmet webbing without authorization. Secure the equipment correctly, move normally, and judge the actual consequence.
Whether buckles remain reachable after all equipment is fitted
Helmet buckles remain compatible with surrounding equipment when the wearer can fasten, release, and verify them as required without displacing other gear.
Complete this check after clothing, face coverings, collars, ear equipment, and gloves are in their final configuration. Confirm that the buckle can be fully engaged, inspected or confirmed as instructed, adjusted where required, and released through the approved method.
Reduced convenience differs from obstruction. A buckle can be less easy to reach yet still fully operable; it fails when normal required fastening cannot be completed or when reaching it repeatedly moves the helmet or other protective equipment.
Never add an improvised extension, knot, clip, or substitute closure. The original or manufacturer-approved hardware defines the system.
How neck coverings or collars can obstruct the chin-strap system
Neck coverings or collars interfere with the chin-strap system when they prevent correct strap routing, closure, adjustment, or stable contact.
Inspect whether a scarf, gaiter, hood, balaclava, high collar, neck guard, or other layer sits beneath, above, or against the strap path. Nearby fabric is not automatically a problem, but bulky or shifting material can push the strap, cover the buckle, or change chin and jaw contact.
Do not prescribe a universal over-or-under arrangement. Follow the helmet and clothing or protective-equipment instructions for the exact use. Seasonal clothing must be tested rather than assumed compatible because its thickness and movement differ from a warm-weather setup.
If correct retention cannot be achieved with the covering in place, remove or change the covering or select a compatible approved configuration before use.
Whether helmet adjustments can still be made without removing other gear
Helmet adjustments remain functionally compatible when required fit and retention controls can still be accessed and set correctly with the complete equipment configuration.
Separate initial setup from later verification. Some manufacturers require the wearer to adjust components before adding another layer; others provide controls intended for access in the final configuration. Follow that exact sequence rather than assuming every control must remain adjustable at every moment.
The pass criterion is that all required settings can be established and checked correctly. If an essential dial, slider, strap adjuster, buckle, or suspension control is blocked, the setup remains unresolved.
Do not modify controls or add extensions. Correctly secured means set according to instructions, not tightened to the maximum.
Compatibility check 3
Does the Full Equipment Setup Change Helmet Position or Stability?
The full equipment setup is compatible only when adding the surrounding gear does not materially change the helmet's established correct position or stability.
This is the whole-system movement stage. Compare the helmet before and after equipment is added, then use realistic head movement to expose interference that static inspection misses.
Whether the helmet remains in the same position before and after adding other gear
Begin with a valid helmet-only fit using the exact manufacturer instructions. Note level, brow position, crown seating, side alignment, rear position, retention, and independent stability at the level the helmet category requires.
Add equipment without changing helmet settings unless the documented fitting sequence requires it. Compare the same reference points. Normal settling of an external item is not helmet displacement; lift, tilt, rotation, or lateral movement of the helmet is.
If the baseline is wrong, stop. Compatibility cannot be assessed on a helmet that is already the wrong size, shape, position, or retention configuration.
How head rotation can reveal hidden equipment interference
Head rotation reveals hidden equipment interference when components that appear clear at rest collide, pull, or shift during normal movement.
Turn the head through the range required for the activity while keeping the torso and equipment in realistic posture. Observe shell-to-collar contact, cable tension, strap migration, goggle movement, ear-protection contact, and any change in helmet position.
Transient motion of an accessory does not automatically fail the setup. Repeated collision or pulling that moves the helmet, blocks the view, alters retention, or restricts required rotation does.
Do not force an extreme range or use a clinical mobility benchmark. The relevant movement belongs to the intended task and wearer.
Whether looking up or down causes the helmet to lift or tilt
Looking up or down indicates incompatibility when surrounding equipment causes the helmet to lift, tilt, or leave its established position.
Raise and lower the head through realistic use movement. Watch the rear and lower shell against collars or shoulder protection, the front against goggles or face equipment, and any cable or strap that tightens as the angle changes.
Touching is not the same as moving. The interface passes when required motion remains available and the helmet stays in position. It needs correction when another component repeatedly changes helmet angle or seating.
There is no universal acceptable lift distance. A repeatable equipment-induced departure from the correct baseline is enough to reject the current configuration.
How repeated movement exposes strap or accessory migration
Repeated movement exposes strap or accessory migration when components progressively slide, rotate, loosen, or pull the helmet away from their starting positions.
Repeat the ordinary rotation, upward and downward viewing, and posture changes long enough to reveal a pattern without using an arbitrary cycle count. Note the starting position of straps, goggles, mounts, ear protection, and controls.
Initial settling may stop after the first movement. Continued change is migration. It becomes incompatible when it alters helmet position, retention routing, visibility, pressure, or equipment function.
Before rejecting the pairing, confirm that every component was installed and fastened correctly. If migration continues in the approved configuration, adjust or replace the responsible item.
Why the helmet should not depend on surrounding equipment to stay in position
A helmet must maintain its intended fit and retention without relying on collars, goggles, headphones, or other surrounding equipment to hold it in position.
External bracing can hide an incorrect base fit. A collar may stop a loose helmet from moving rearward, tight goggles may hold it against the brow, or headphones may fill excess side space. The final setup can feel stable even though the helmet alone does not fit correctly.
Remove surrounding equipment and verify that the helmet independently maintains the position and retention required by its manufacturer. Accessories are not sizing shims, fit pads, or retention substitutes.
If the helmet is unstable without external support, resolve size, shape, position, adjustment, or retention before returning to compatibility testing.
Compatibility check 4
Which Compatibility Problems Are Acceptable and Which Mean the Setup Should Change?
Compatibility problems require different responses: incidental contact can be acceptable, while persistent pressure, helmet displacement, restricted visibility or movement, and unusable retention require adjustment or rejection.
Use three outcomes. Acceptable means the interface produces no material functional change and violates no manufacturer restriction. Needs adjustment means an approved configuration change can resolve the problem before use. Incompatible means a critical conflict remains, required operation cannot be completed, or the combination is prohibited.
Minor contact that does not change position, movement, or comfort
Minor equipment contact is generally a lower-level concern when it does not change helmet position, required movement, equipment stability, or wearer comfort.
Observe the contact at rest and during normal movement. If the surfaces touch but neither component is forced out of position, retention and visibility remain correct, required motion remains available, and the wearer develops no problematic pressure, the interaction may be acceptable.
That conclusion remains conditional on the exact instructions. A manufacturer can prohibit a contact or combination that appears harmless to the user. Absence of pain also does not prove protective performance.
Monitor contact that is close to becoming interference, especially after final fastening or a change in clothing. Reclassify it if force, migration, obstruction, or discomfort develops.
Persistent pressure points that indicate a fit conflict
Persistent pressure created by another component indicates a compatibility conflict when it produces localized discomfort or forces either the helmet or equipment out of its intended position.
Compare the pressure with the helmet-only fit. Normal intended contact should remain distributed as the helmet manufacturer describes. A new localized point beneath eyewear arms, speakers, ear protection, straps, mounts, or coverings identifies an equipment interaction rather than ordinary snugness.
Do not prescribe a universal duration or force and do not diagnose a medical cause. The actionable observation is that normal use repeatedly produces a concentrated point, pain, frame displacement, helmet shift, or another functional change.
Use only approved pad, accessory, or position options to correct it. Do not normalize severe pressure as a break-in process or remove required material to create space.
Equipment that pushes the helmet out of its normal position
Return to the helmet-only baseline and identify the first added component that causes lift, tilt, rotation, forward movement, rearward movement, or lateral shift. Remove that item and confirm that the correct position returns.
Do not compensate by tightening the retention system excessively or choosing a larger helmet solely to create accessory space. Those actions can hide the interface problem while introducing incorrect fit geometry.
The current configuration fails even if the helmet moves only during a particular normal posture. Compatibility must persist through the movements that matter to the intended activity.
Restricted head movement or reduced visibility as rejection signals
Restricted required head movement or materially reduced usable visibility are rejection signals when they result from the combined equipment setup.
Test movement and visibility independently. The head must complete the movement required for the task without equipment collision moving the helmet, while the combined helmet and eyewear position must preserve the usable view needed for the activity.
Do not reject the setup solely because an irrelevant extreme movement is limited, and do not publish a universal angle. Conversely, a normal required view or movement that remains blocked after approved adjustment is a functional failure.
This consumer check does not reproduce a laboratory test or diagnose a visual or mobility condition. It identifies whether added equipment causes a practical restriction.
Fastening systems that cannot be secured or adjusted correctly
A helmet-equipment combination is incompatible when required fastening or adjustment systems cannot be secured and set according to manufacturer instructions.
Required closure is non-negotiable. Check every buckle, strap, adjuster, chin cup, dial, suspension control, or other fastening element specified for the helmet. The complete equipment setup must allow the wearer to establish and verify the instructed configuration.
Inconvenient reach may call for reassessment, but an inability to engage, route, tension, or confirm the system correctly is an automatic fail. Do not accept a buckle that is merely connected if it is not closed and positioned as required.
Improvised knots, extensions, clips, rerouting, substitute webbing, or altered hardware are not compatibility fixes.
Accessories that repeatedly shift during normal movement
Accessories that repeatedly shift during normal movement remain incompatible when their migration affects helmet position, retention, visibility, pressure, or equipment function.
Movement alone is not enough to fail an accessory. Some components flex or settle without affecting the helmet. Classify the consequence: does migration pull a strap, move goggles, block the view, create pressure, loosen a mount, shift the helmet, or prevent normal operation?
If correct installation and approved adjustment stop the movement, the setup may pass after retesting. If consequential migration continues, reject the current attachment or pairing.
Do not invent a movement tolerance or repetition count. The relevant threshold is a recurring material effect on the evaluated system.
Pass, Adjust, or Reject the Setup
| Observation | Acceptable | Needs Adjustment | Incompatible |
|---|---|---|---|
| Incidental contact | No functional change | Recheck positioning | Manufacturer prohibits contact |
| Pressure | Normal intended fit contact | Local equipment-induced pressure | Persistent or severe pressure or displacement |
| Helmet position | Unchanged | Minor setup issue corrected before use | Equipment repeatedly pushes helmet out of position |
| Movement | Required movement preserved | Equipment needs repositioning | Required movement remains restricted |
| Visibility | Usable view preserved | Eyewear needs repositioning | Material obstruction remains |
| Retention | Correctly secured | Routing corrected before use | Cannot be secured as instructed |
| Accessory movement | No helmet consequence | Attachment requires correction | Repeated migration affects helmet function |
How Should You Test Helmet Compatibility Before Using the Complete Setup?
Helmet compatibility should be tested by establishing correct helmet fit first, adding equipment in stages, and rechecking position, retention, visibility, pressure, and movement after every meaningful change.
The order keeps each failure traceable. Stop whenever a stage fails: later observations are not reliable while the helmet or an earlier component is already displaced, obstructed, or incorrectly fastened.
Put on the helmet first and establish its normal position
Use the exact helmet fitting instructions to confirm the correct size range, head position, contact, adjustment, and retention. The helmet must remain independently stable without goggles, collars, headphones, or other equipment bracing it.
Record simple reference points appropriate to the model: brow position, crown seating, side alignment, rear edge, strap route, buckle closure, and the movement described by the manufacturer. Do not create substitute numerical thresholds.
If the helmet-only fit fails, end the compatibility test. A wrong baseline makes every before-and-after comparison invalid.
Add eyewear and head-mounted accessories one component at a time
Add eyewear and head-mounted accessories one component at a time so any new pressure, displacement, or obstruction can be traced to the component that caused it.
Begin with the eyewear used in normal operation, then add ear-area equipment, communications hardware, face protection, lights, cameras, or other approved head-mounted items individually. Follow each manufacturer's installation sequence.
After every addition, recheck its contact zone, helmet position, retention, visibility, control access, and basic movement. A one-component change creates a clear cause-and-effect comparison.
If one item fails, stop before adding more. Simultaneous troubleshooting hides which component or interface created the problem.
Add neck and upper-body protective equipment last
Add neck and upper-body protective equipment after head-area components so lower-helmet interference can be evaluated against an already stable helmet setup.
Once the head-area configuration passes, add the actual collar, neck guard, brace, jacket, shoulder protection, or other relevant body equipment. Focus on new contact at the rear and lower shell, strap and buckle access, and required movement.
This staged sequence is an editorial troubleshooting method, not a universal donning law. If the helmet or protective-equipment manufacturer specifies a different order, follow that order and preserve the same principle: isolate each meaningful change.
Do not force components together simply to complete the sequence. A prohibited or mechanically incompatible layer stops the test.
Recheck helmet position after every equipment layer
Recheck helmet position after every equipment layer so the exact point at which displacement begins remains identifiable.
Compare the same helmet reference points against the valid baseline. Note lift, tilt, rotation, forward or rearward movement, and lateral shift. Keep helmet settings unchanged unless the official fitting sequence requires an approved adjustment.
When a change appears, remove the latest layer and confirm whether the helmet returns to baseline. That reversal helps separate an equipment-induced problem from an underlying size or shape issue.
Do not continue through obvious displacement. Later layers can mask or compound the first conflict and make diagnosis less reliable.
Rotate, tilt, and lower the head through the normal movement range
Rotate, tilt, raise, and lower the head through the normal movement required for the activity to expose interference that static fitting cannot reveal.
Move gently through realistic positions while the complete setup is correctly secured. Watch for collision, pulling, helmet lift, tilt, strap migration, eyewear shift, blocked vision, cable tension, collar contact, and control obstruction.
The movement range belongs to the task and wearer. Do not force pain, imitate an unrelated extreme posture, or publish generic degrees. This is a functional compatibility check rather than a clinical or certification test.
Any required movement that remains blocked or repeatedly changes helmet position fails the current configuration.
Inspect pressure points, gaps, blocked adjustments, and shifting components
Inspect pressure points, unusual gaps, blocked adjustments, and shifting components after movement because each signal identifies a different form of equipment interference.
Check pressure at eyewear arms, ears, pads, straps, jaw, neck, and mounts. Compare visible gaps with the original configuration, but treat a gap as meaningful only when it indicates displacement, unstable alignment, or a documented fit problem. Confirm access to every required control and inspect components for migration.
Map each symptom to the interface that caused it. Pressure can indicate competing thickness; a new gap can reveal lift; a blocked control can show overlap; migration can reveal attachment or tension conflict.
Do not dismantle the helmet to investigate hidden structures. Resolve observable failures through approved settings, compatible equipment, or manufacturer guidance.
Repeat the test after tightening all straps and fastening systems
Repeat the compatibility test after all straps and fastening systems are secured correctly because final tension can change equipment position and interface pressure.
Secure—not maximally tighten—every helmet and equipment fastening according to its instructions. Final strap tension can pull goggles into the brow, move a collar, change ear-protection pressure, alter cable routes, or expose overlap that a loose trial missed.
Repeat the before-and-after position comparison, visibility check, control-access check, and normal movement sequence. The final judgment must represent the configuration actually used.
Do not overtighten to suppress movement created by incompatible geometry. If correct fastening reveals a conflict, change the approved setup and retest.
Compatibility check 5
What Does a Fully Compatible Helmet Setup Look Like?
A fully compatible helmet setup keeps the helmet, eyewear, protective equipment, retention system, and accessories in their intended positions while preserving required visibility, adjustment access, and normal movement.
That result depends on the complete configuration, not on any component passing by itself. The helmet must first fit correctly on its own; each approved layer must then preserve that baseline; and the final secured configuration must remain functional through the movement required for the activity. One unresolved safety-critical interface prevents a full compatibility pass.
This is a configuration-specific conclusion. It applies to the tested wearer, helmet, equipment, settings, clothing layers, and intended activity. It does not certify impact performance, establish compliance with a standard, or predict an injury outcome.
The helmet maintains its intended position with all equipment fitted
The correct reference is the helmet-only baseline established from the manufacturer's instructions. With eyewear, communications equipment, neck protection, clothing, and other approved equipment in place, the helmet should not be lifted by a collar, tilted by a goggle frame, rotated by competing straps, or pushed sideways by ear-area hardware.
Position must also remain independent. Surrounding equipment should not wedge the helmet into place or hide instability that appears when another component is removed. A stable-looking configuration fails if the helmet relies on goggles, a collar, a hood, or shoulder equipment for support.
Use consistent visual and tactile reference points rather than an invented universal measurement. If the helmet does not return to the same valid baseline after the interfering component is removed and refitted, isolate that interface, use only approved adjustments, and repeat the test.
Eyewear remains stable without excessive pressure or visibility loss
A compatible setup keeps eyewear stable without equipment-induced pressure that disrupts fit or material obstruction of the usable field of vision.
Glasses or goggles should occupy their intended position while the helmet, eye opening, brow, side padding, straps, and any face protection coexist without forcing one another out of alignment. The frame should not need to be twisted, compressed, or propped against the helmet to stay in place.
Normal intended contact is not automatically a failure. The decisive question is whether the interaction creates a persistent pressure point, shifts the helmet or eyewear, breaks a required seal, blocks usable vision, or causes repeated migration during normal movement. The exact eyewear and helmet instructions determine whether a particular gap, overlap, or interface is permitted.
Check the final secured setup, not a loose trial. If the eyewear passes while stationary but shifts when the head turns, when goggles are tensioned, or when another layer is added, the complete configuration has not passed.
Neck and shoulder equipment allow normal head movement
A compatible setup allows the head movement required for the intended activity without neck or shoulder equipment forcing the helmet out of position.
The rear and lower helmet edges must coexist with the collar, neck guard, brace, jacket, and shoulder protection throughout realistic movement. Contact can occur in some designed systems, but it becomes incompatible when it repeatedly lifts or tilts the helmet, blocks a required posture, changes the wearer's view, or prevents a component from remaining correctly positioned.
Evaluate movement in the final working posture and with all closures set as instructed. A setup used while cycling, riding, climbing, working overhead, or operating equipment may require different head movement, so a generic range or angle would be misleading.
Do not gain clearance by loosening required protection, lowering the helmet away from its intended position, removing required padding, or changing an undocumented component. The solution must remain within both manufacturers' approved configurations.
Straps, buckles, and adjustment systems remain accessible and unobstructed
A fully compatible setup leaves required helmet straps, buckles, and adjustment systems correctly routed, secure, accessible, and unobstructed.
The retention path should remain continuous from the helmet's attachment points through its webbing and adjustment hardware to the closure. Eyewear arms, goggle straps, ear protection, hoods, collars, cables, and accessory mounts must not reroute, trap, twist, loosen, or conceal parts that the helmet instructions require to remain correctly positioned.
Access matters when a control must be operated to fit, secure, verify, release, or normally use the helmet. An obscured optional control may be a usability issue, but a buckle that cannot close, an adjuster that cannot be reached when required, or a strap whose routing cannot be verified is a compatibility failure.
Do not replace approved hardware or invent a new strap path to make equipment coexist. Use documented attachment locations, approved settings, and manufacturer-recognized components only.
No accessory relies on helmet displacement to create enough space
A compatible accessory fits without pushing the helmet away from its correct position to create the space the accessory requires.
False clearance can look acceptable from the outside: a speaker appears to fit because it raises one side of the helmet, a goggle frame clears the brow because it tilts the shell rearward, or a collar gains room by lifting the back edge. In each case, the accessory has not fit within the valid interface; it has changed the helmet baseline.
Judge clearance only after confirming helmet position. Remove the accessory, restore the correct helmet-only setup, and add the item again according to its instructions. If the same displacement returns, the conflict is repeatable and the current configuration should change.
Approved alternatives can include a documented position, setting, mount, or compatible model. They do not include cutting the shell or liner, removing required padding, drilling attachment holes, adding improvised spacers, or loosening the retention system.
The complete setup remains stable through normal movement
A fully compatible helmet setup remains functionally stable through the normal movement required for its intended use.
The final test brings every interface together. With all components installed and secured as they will be used, the helmet remains at baseline, eyewear and accessories stay positioned, required vision remains clear, straps and closures remain correctly routed, controls remain available, and neck or shoulder equipment does not force displacement.
Movement is what separates a static fit from a working configuration. Rotate, raise, lower, and tilt the head only through realistic activity movements, then recheck reference points, pressure, visibility, retention, controls, and component migration. Repeatable lift, tilt, shift, obstruction, or restriction means the configuration has not passed even if it looked orderly while stationary.
Compatibility check 6