
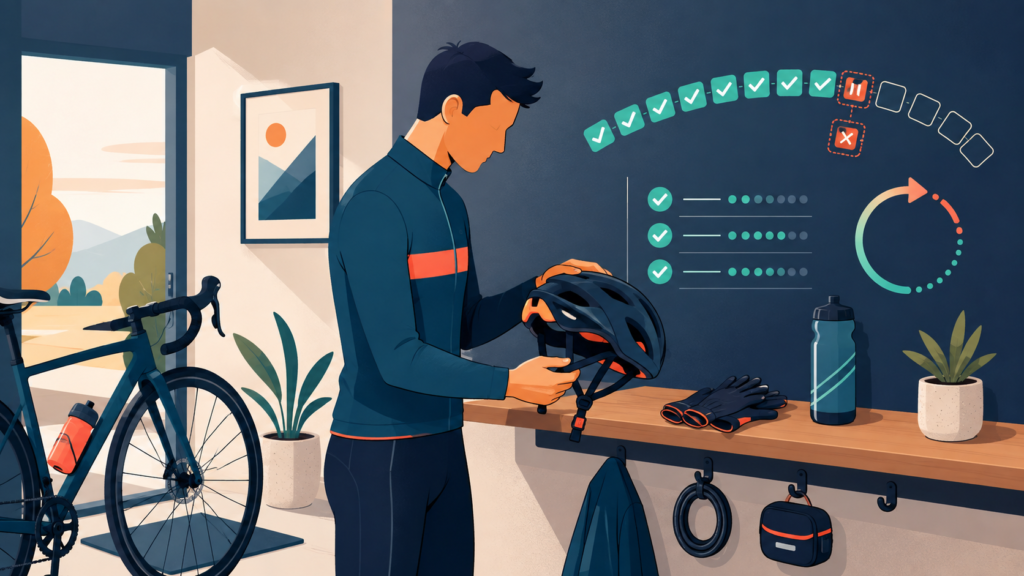
How to Build a Pre-Ride Helmet Check Habit in 30 Days
A pre-ride helmet check habit uses a consistent trigger and the LOOK, POSITION, SECURE sequence before every ride, helping riders check visible condition, placement, and retention while stopping when a concern requires escalation.
This is a 30-day practice system, not a promise that the behavior becomes automatic within exactly 30 days. Habit development varies between people and behaviors, so use the month as a structured practice-and-review cycle rather than a deadline.[6]
Important safety boundary: This routine does not certify a helmet, reveal every hidden defect, guarantee protection, prevent injury, or replace instructions for the specific helmet. Impact damage may not always be visible, and helmet-specific selection, fit, retention, service, and replacement questions require authoritative guidance.[1]

Use the printable companion to set your anchor, record the LOOK → POSITION → SECURE routine, track 30 days of ride opportunities, review friction, and plan the next cycle.
Download the 30-Day Habit BuilderOne completed check = all three actions before riding.
The Three Actions That Define a Completed Pre-Ride Check
A completed pre-ride helmet check requires the rider to LOOK, POSITION, and SECURE the helmet before riding. All three actions belong to one sequence. Wearing the helmet without completing all three is partial or missed.
LOOK for visible helmet concerns
LOOK means scanning the helmet’s visible condition, required components, and recent-impact history before putting it on. Use enough light to see the accessible shell, liner, straps or other retention parts, buckle, anchors, hardware, adjustment components, and any required removable components.
The purpose is screening, not structural diagnosis. A visible concern is a reason to pause and apply a response rule. The absence of a visible crack does not prove hidden damage is absent; CPSC specifically requires bicycle-helmet warnings explaining that impact damage may not be visible.[1]
Do not bend, dismantle, press, cut, or stress-test helmet structures. If recent-impact history is unresolved, keep the helmet out of ride service until the appropriate manufacturer or authoritative guidance resolves the question.
POSITION the helmet correctly
POSITION means selecting the correct helmet, placing it in the intended orientation, and confirming stable contact without severe pressure. First verify that the helmet is intended for the activity; similar-looking helmets can have different intended uses.[2]
Then confirm the intended front-to-back orientation, stable placement, and a fit that is neither unexpectedly loose nor painfully tight. Do not apply one universal angle, finger-width rule, pressure point, or accessory configuration across every helmet category. Detailed criteria belong to the exact product and activity. Bell’s bicycle guidance, for example, is specific to bicycle-helmet fitting rather than a universal formula for every protective helmet.[4]
Use an activity-specific helmet fit and sizing guide when the basic check reveals a fit question that needs closer evaluation.
SECURE the retention system
SECURE means routing the retention system correctly, fully closing the buckle or intended closure, setting the adjustment, and confirming that the adjustment holds during gentle normal head movement. A closed buckle does not compensate for incorrect routing or unstable positioning.
Retention designs vary. Use the exact manufacturer instructions for routing, buckle operation, user-adjustable components, optional parts, and permitted service procedures. SHOEI, for example, directs users to the corresponding helmet manual before use.[5]
Do not knot straps, cut them, add improvised clips, substitute unverified buckles, or perform unapproved repairs.
Apply the completion rule
The completion rule counts the habit only when LOOK, POSITION, and SECURE all occur before the ride begins. Use the same definition throughout the entire 30-day cycle.
| Outcome | Meaning |
|---|---|
| Complete | LOOK + POSITION + SECURE occurred before riding. |
| Partial | At least one required action was omitted or shortened. |
| Missed | The ride began without the complete routine. |
| No ride | No ride opportunity occurred; this is neutral. |
| Stopped | The routine occurred and a concern appropriately prevented the ride. |
- LOOK: Scan visible condition, components, and recent-impact concern.
- POSITION: Select and place the correct helmet in a stable position.
- SECURE: Route, close, adjust, and confirm centered retention.
- COUNT: Mark completion only when all three occurred before riding.
Choose an Anchor That Happens Before Nearly Every Ride
A reliable pre-ride anchor is an existing action that occurs before nearly every ride and immediately prompts the helmet check. Research on implementation intentions supports linking a planned response to a recognizable situational cue, while habit research supports repetition in a consistent context.[7]
Select a primary trigger
A primary trigger is the existing pre-ride action the rider will use to start LOOK, POSITION, and SECURE. Strong candidates include picking up a key, unlocking the bicycle or vehicle, putting on riding shoes or gloves, or taking the helmet from storage.
Choose one trigger that already happens on most riding days, is easy to notice, occurs before movement begins, and allows immediate contact with the helmet. A time-of-day reminder is usually weaker when ride times vary because the cue may occur without a ride following.
Test whether the anchor is reliable
An anchor is reliable when it occurs before nearly every ride, attracts attention, and allows the helmet check to begin immediately. Across several normal ride starts, ask: Did the action occur? Did I notice it? Did the check start immediately? Did another task repeatedly interrupt the link?
One successful ride does not establish reliability. Test the anchor at home, alternate start locations, and any context where a different helmet or routine is used.
Create a backup anchor
The backup anchor starts the READY check before the helmet goes on whenever the primary trigger fails.
The helmet itself becomes the final portable cue. If you repeatedly depend on the fallback, treat that as evidence that the primary anchor needs refinement.
Write the anchor formula
The anchor formula states the existing action and the immediate LOOK, POSITION, and SECURE response in one sentence.
Formula: After I __________, I will immediately hold my helmet and complete LOOK, POSITION, and SECURE.
- Select one existing action that occurs before most rides.
- Confirm the action is easy to notice.
- Confirm the check starts immediately afterward.
- Adopt the fallback: before the helmet goes on, READY begins.
- Write the anchor formula in one sentence.
Arrange the Riding Environment to Make the Check Easier
The riding environment supports the helmet-check habit when the helmet, trigger item, and instructions remain visible and easy to reach. The objective is to remove avoidable searching, confusion, and delay without compromising appropriate helmet storage.
Give the helmet one visible storage location
A visible, consistent storage location turns the helmet into an environmental cue before each ride. Choose a location that is easy to notice, appropriate for the helmet, protected from falling or crushing, and consistent with manufacturer storage instructions.
Return the helmet to the same location after use. Visibility is useful only when it does not expose the helmet to unsuitable storage conditions.
Place an unavoidable riding item beside it
Placing an unavoidable riding item beside the helmet connects an existing ride requirement to the READY check. A key, gloves, shoes, access card, or compact reminder card can work when that item is normally required before departure.
Avoid decorative cues that become easy to ignore, and never place heavy items on top of the helmet.
Keep supporting information accessible
Accessible manufacturer instructions help resolve helmet-specific fit, component, accessory, service, and maintenance questions without improvising. Keep the original manual, official digital instructions, or exact-model support page easy to reach.
Quick access does not turn the pre-ride habit into a full inspection. It gives you an authoritative route when the minimum check finds something uncertain. If the uncertainty concerns a certification claim on the helmet, packaging, or product listing, use the helmet certification claim verification template before relying on that claim.
Adapt the setup for multiple helmets or locations
Multiple helmets or ride-start locations require the same READY sequence, a visible cue, and clear identification of the helmet selected for the ride. Replicate the cue pattern at each regular start location, but keep the product-specific rules separate.
- Assign one suitable visible storage location.
- Place one unavoidable riding item beside the helmet.
- Store official instructions where they are quickly accessible.
- Replicate the cue at each regular ride-start location.
- Identify the exact helmet selected for the activity.
Know When the 10-Second Routine Is Not Enough
The 10-second READY routine is not enough when helmet selection, visible condition, fit, accessories, impact history, or service status requires closer verification. “10-second” is a compact label, not a universal stopwatch requirement.
Confirm the helmet matches the activity
The fuller readiness check begins by confirming that the selected helmet is intended for the riding activity. A helmet fitting well does not itself establish activity suitability. Verify the exact product through manufacturer information and relevant helmet safety standards and certifications guidance.[2]
Inspect visible condition and completeness
A fuller visible inspection checks the shell, accessible liner, padding, retention system, hardware, and required components for observable damage or incompleteness. Cracks, obvious deformation, damaged retention parts, or missing required components call for a stop or verification response rather than an improvised repair.
Do not invent universal damage thresholds. CPSC advises replacing helmets when needed and notes that incidents may create damage that is not visible; its public guidance also identifies cracked shells, worn straps, and missing parts as replacement concerns for bicycle helmets.[3]
Confirm fit, stability, and accessories
The fuller readiness check confirms that the helmet remains correctly placed, stable, and complete with any required protection or approved accessories. An accessory appearing physically secure does not prove compatibility. Use the exact manufacturer’s fit and accessory instructions.
Resolve impact or service uncertainty
Impact or service uncertainty remains unresolved until an authoritative source confirms the required next action. Pause when there is a known or suspected impact, undocumented incident, crushing concern, unclear service status, or uncertain previous history. No visible crack does not settle the question.[1]
Use authoritative helmet replacement after an impact guidance for the exact helmet or product family.
- Verify the helmet matches the activity.
- Inspect visible condition and required components.
- Confirm fit, stability, and approved accessories.
- Pause for unresolved impact history.
- Consult authoritative service or replacement guidance.
Use Clear Stop Rules When the Check Finds a Problem
Clear stop rules convert each helmet-check finding into a correction, verification, stop-use decision, or medical escalation. Safety takes priority over the planned ride, completion percentage, or streak.
Correct minor permitted adjustments
A minor permitted adjustment is corrected according to approved instructions before the affected READY step is repeated. Pause, identify the issue, verify that user adjustment is permitted, make only that adjustment, repeat the affected step, and record Corrected if it holds.
Adjustment is not repair. Damaged components do not become “adjustment issues” simply because they are inconvenient.
Stop when required components are missing
A helmet with a missing required component remains out of use until an approved component is installed correctly. Confirm through the manufacturer whether the part is required, replaceable, and compatible. Do not substitute generic parts.
Stop using a visibly damaged helmet
Visible damage to the strap, buckle, anchor, shell, or liner requires the rider to stop using the helmet and obtain authoritative guidance. Do not use adhesives, stitching, drilling, heating, reshaping, or unverified hardware to restore a safety-critical part.
Verify uncertain compatibility or impact history
Uncertain compatibility or impact history requires authoritative verification before the helmet returns to use. Use the exact manufacturer, official manual, approved service channel, or a recognized activity-specific authority. Crowd consensus does not establish compatibility or structural condition.
Escalate physical symptoms
Severe pain, breathing restriction, dizziness, or neurological symptoms require the rider to stop and seek appropriate professional guidance. The helmet routine is not a medical diagnostic test.
Breathing difficulty can be a medical emergency, and neurological symptoms such as weakness with numbness or tingling can require urgent assessment.[8][9] Do not use this template to diagnose concussion, circulation problems, nerve compression, or another condition.
Protect safety rather than the streak
Protecting safety means recording the outcome honestly and stopping the ride whenever a possible safety-critical problem remains unresolved. A stopped ride after a completed check is a successful safety response, not a missed habit.
Finding-to-action decision table| Finding | Required Action | Repeat Check? | Tracking Result |
|---|---|---|---|
| Minor adjustment permitted by instructions | Make the adjustment | Repeat affected READY step | Corrected |
| Required component missing | Do not ride; obtain approved resolution | Repeat full check afterward | Stopped |
| Strap, buckle, anchor, shell, or liner visibly damaged | Stop using the helmet | Resume only after authoritative resolution | Stopped |
| Compatibility or impact history uncertain | Consult authoritative source | Resume after uncertainty is resolved | Stopped |
| Severe pain, breathing restriction, dizziness, or neurological symptoms | Stop and seek appropriate professional guidance | Do not use routine as a medical test | Stopped |
Track Every Ride With a Consistent Marking System
A consistent marking system converts each ride opportunity into evidence about whether the READY routine occurred and what result followed. Keep the record small enough to use every time.
Record the basic ride data
The daily record captures the date, ride occurrence, habit mark, readiness result, and one brief note. Record it soon after the ride decision. A short note such as “helmet out of sight,” “forgot SECURE,” “strap corrected,” or “impact concern—stopped” is enough.
Use one code for each outcome
Each outcome receives one code: X for complete, P for partial, M for missed, R for no ride, and S for a ride stopped after a problem was found.
Do not merge S into M, and do not count R as a completed or missed check.
Record the readiness result
The readiness result records whether the helmet was Ready, Corrected, or Stopped after the check. Habit mark and readiness result measure different things: the mark records whether the routine happened; the readiness result records what action followed.
Separate the first and second halves of the cycle
Dividing the cycle into Days 1–15 and Days 16–30 helps the rider compare early setup with later consistency. Improvement in the second half describes the tracking record; it does not prove automatic habit formation.
Record each ride once, see your progress immediately, and review or edit all 30 days in the same tracker.
What happened before movement began?
The tracker starts on the next blank cycle day. Saving updates your progress and ride history below.
Saved rides appear here automatically. You can also edit any day directly in the table; the progress summary recalculates as you make changes.
| Day | Date | Ride? | Mark | Result | Brief Note |
|---|---|---|---|---|---|
| 1 | |||||
| 2 | |||||
| 3 | |||||
| 4 | |||||
| 5 | |||||
| 6 | |||||
| 7 | |||||
| 8 | |||||
| 9 | |||||
| 10 | |||||
| 11 | |||||
| 12 | |||||
| 13 | |||||
| 14 | |||||
| 15 | |||||
| 16 | |||||
| 17 | |||||
| 18 | |||||
| 19 | |||||
| 20 | |||||
| 21 | |||||
| 22 | |||||
| 23 | |||||
| 24 | |||||
| 25 | |||||
| 26 | |||||
| 27 | |||||
| 28 | |||||
| 29 | |||||
| 30 |
Recover Quickly After a Missed Check
A missed check requires a prompt return at the next ride, not abandonment of the 30-day cycle. Leave the miss in the record and treat the next riding opportunity as the recovery point. Habit research supports avoiding all-or-nothing interpretations of a single lapse.[6]
Resume at the next ride
Resuming at the next ride restores the READY sequence without restarting the entire program. Keep the original day count, preserve the M in the record, and use the next actual ride—not necessarily the next calendar day—as the recovery opportunity.
Prevent two consecutive misses
Preventing two consecutive misses means treating the next riding opportunity as the required recovery point. This is a practical program rule, not a guarantee. No-ride days are neutral, and a stopped ride after the routine occurred is not a miss.
Diagnose what interrupted the habit
Diagnosing the interruption identifies what happened, whether the anchor occurred, and what system change should be made before the next ride. “I forgot” is only the starting observation. Ask whether the helmet was out of sight, the anchor failed, another task interrupted the sequence, a different location disrupted the cue, or the routine became too long.
Reduce the routine when it has become too difficult
When the routine becomes too difficult to repeat, return to LOOK, POSITION, and SECURE and move longer inspections into a separate maintenance routine. Simplification applies to routine size, not to problem response: any concern found during LOOK still requires the correct stop, verification, or escalation action.
Review the Habit at the End of Each Week
A weekly review identifies the cue, routine size, conditions, and response behaviors that supported or obstructed consistent helmet checks. Keep it short and end with one specific change for the following week.
Measure weekly performance
Weekly performance is measured by the number of rides, completed checks, main obstacle, and one planned system change. Compare completion counts only in the context of ride opportunities.
Test the anchor
The weekly anchor test asks whether the cue occurred before nearly every ride and triggered the check immediately. Separate cue occurrence from cue effectiveness: an anchor that did not occur is a selection problem; an anchor that occurred but did not trigger action is a response-link problem.
Evaluate routine size
Routine size is appropriate when LOOK, POSITION, and SECURE remain small enough to repeat before every ride. If extra inspection tasks create delay or avoidance, move those tasks into scheduled maintenance. Do not optimize for speed by weakening the three required actions.
Identify success conditions and failure risks
Success conditions explain what made completed checks easy, while failure risks explain what nearly caused a miss. Preserve one helpful condition and reduce one changeable risk; avoid broad personality explanations that do not produce a practical system change.
Review problem-response behavior
Problem-response behavior is successful when the rider corrects, verifies, stops, or escalates according to the finding rather than proceeding automatically. Completing the routine has limited value if an identified concern is then ignored.
Calculate the 30-Day Completion Result
The 30-day completion result summarizes ride opportunities, check outcomes, safety findings, and sequence consistency without claiming that habit formation is complete.
Total the cycle outcomes
The cycle totals include total rides, complete checks, partial checks, missed checks, problems found, and stopped rides. R no-ride days do not belong in total rides. Problems found and stopped rides are separate: some problems can be corrected before riding, while others require the ride to stop.
Calculate completion rate
Completion rate equals complete checks divided by total rides, multiplied by 100.
Show the numerator and denominator beside the percentage. Do not divide by 30 calendar days, and do not calculate a percentage when total rides equals zero. The percentage measures recorded completion, not automaticity.
Record sequence strength
Sequence strength is recorded as the longest run of successful pre-ride checks during the 30-day cycle. Use ride opportunities, not calendar days. R is neutral; P and M break the run; S can remain part of a successful run when the complete check occurred and the correct safety response stopped the ride.
Summarize the strongest system feature
The strongest system feature is the cue, environmental arrangement, routine-size choice, or response rule that contributed most to consistent completion. Choose one leverage point to preserve rather than naming several “strongest” features.
| Metric | Result |
|---|---|
| Total rides | 0 |
| Complete checks | 0 |
| Partial checks | 0 |
| Missed checks | 0 |
| Problems found | — |
| Stopped rides | 0 |
| Completion rate | — |
| Longest successful run | 0 |
| Strongest system feature | — |
Diagnose the Main Source of Habit Friction
Habit-friction diagnosis identifies the obstacle, cue failure, or READY step that most reduced reliable pre-ride completion. The 0–3 scale is a personal review tool, not a validated psychological measure.
Rate common obstacles
Common obstacles are rated from 0 to 3 to show which source of friction affected the cycle most often or most strongly: 0 means no meaningful interference; 1 occasional minor interference; 2 repeated or moderate interference; 3 frequent or major interference.
| Obstacle | Score 0–3 | Evidence From Tracker |
|---|---|---|
| Rushing | ||
| Helmet out of sight | ||
| Different riding locations | ||
| Routine too long | ||
| Multiple helmets | ||
| Poor lighting | ||
| Forgetfulness | ||
| Social pressure | ||
| Unclear problem response |
Highest friction: Not rated yet
Evaluate anchor effectiveness
Anchor effectiveness depends on whether the cue was noticed, triggered immediate action, kept the helmet available, and occurred before distraction began. Diagnose the failed stage before replacing the whole anchor.
- Anchor absent → cue-selection problem.
- Anchor present but unnoticed → visibility problem.
- Anchor noticed but action delayed → cue-response problem.
- Helmet unavailable → environmental problem.
Identify the weakest READY step
The weakest READY step is LOOK, POSITION, or SECURE—whichever was skipped, shortened, or delayed most often. Use P and M notes to support the choice rather than redefining a step to improve the numbers.
Name the most important system change
The most important system change addresses the highest-impact obstacle without redesigning the entire routine. Preserve what already works and change one primary variable so the next cycle remains interpretable.
Classify the Habit at the End of the Cycle
The end-of-cycle classification describes how reliably the anchor and READY sequence worked during the 30-day practice period. These are practical self-review categories, not validated psychological diagnoses and not proof of permanent automaticity.
AUTOMATIC
AUTOMATIC describes a cycle in which the anchor naturally triggered the check and reminders were rarely needed. The label reflects this cycle’s record and rider experience; it does not guarantee permanent performance.
STABLE
STABLE describes a reliable check that still benefits from a visible cue. Continued cue use is a strength when it supports consistent execution; there is no need to remove a working cue simply to test independence.
NEEDS REFINEMENT
NEEDS REFINEMENT describes a rider who understands the READY routine but often forgets, delays, or skips it. Use repeated P or M outcomes and cue failures to choose a targeted system refinement rather than rebuilding everything.
RESTART SMALLER
RESTART SMALLER describes a routine that became too difficult and should return to the three-step minimum. Move added maintenance tasks elsewhere, but keep LOOK, POSITION, and SECURE unchanged.
| Classification | Completion Pattern | Cue Dependence | Required Next Action |
|---|---|---|---|
| AUTOMATIC | Check occurs naturally and reliably. | Reminders rarely needed. | Preserve the system and monitor. |
| STABLE | Check remains reliable. | Visible cue remains useful. | Keep the cue and refine only minor friction. |
| NEEDS REFINEMENT | Forgetting, delay, or skipping recurs. | Cue or response link is unreliable. | Fix the highest-impact system problem. |
| RESTART SMALLER | Routine complexity prevents repetition. | Cue cannot overcome task burden. | Return to LOOK, POSITION, and SECURE. |
Refine the System for the Next 30-Day Cycle
The next 30-day cycle should preserve what worked and change the single system feature most closely connected to the main failure. The aim is a focused second test, not a total redesign.
Select the main system problem
The main system problem is the one obstacle that most directly explains missed, delayed, or partial READY checks. Use tracker entries and the friction score rather than choosing only the most frustrating issue.
Connect the obstacle to its cause
Connecting the obstacle to its cause requires documenting the biggest obstacle, why it happened, the new strategy, and the refined anchor. Separate the symptom (“I forgot”) from a changeable cause (“the helmet was out of sight”). “Try harder” is not a system strategy.
Match the refinement to the failure
A matched refinement changes the cue, environment, routine size, location setup, helmet-selection process, or response rule associated with the failure.
| Failure | Matched Refinement |
|---|---|
| Anchor rarely occurs | Choose a more reliable existing pre-ride action. |
| Anchor occurs but is overlooked | Increase cue visibility. |
| Helmet is out of sight | Move it to a suitable visible storage location. |
| Routine feels too long | Return to LOOK, POSITION, SECURE; separate maintenance. |
| Second location causes misses | Replicate the cue structure there. |
| Multiple helmets create confusion | Clarify activity-specific helmet selection. |
| One READY step is repeatedly omitted | Add a specific reminder for that step. |
| Problem response is unclear | Keep the stop-rule table accessible. |
| Tracker is inconvenient | Simplify tracking to the required fields. |
Write the next-cycle commitment
The next-cycle commitment records the refined minimum habit, refined anchor, start date, review date, and definition of success. Success should evaluate system improvement and correct recovery rather than demand a perfect streak.
Keep the READY Reference Card Available Before Every Ride
The READY reference card compresses the full system into LOOK, POSITION, SECURE, and a final cue to complete the check before riding.
When helmet selection is the unresolved step, compare the activity-specific helmet types before applying POSITION.
LOOK
- Scan the shell and accessible liner.
- Check strap and buckle.
- Confirm hardware and required components.
- Pause for a recent-impact concern.
POSITION
- Select the correct helmet.
- Confirm the correct orientation.
- Set stable placement.
- Stop for severe pressure.
SECURE
- Route retention correctly.
- Close the buckle fully.
- Confirm adjustment holds.
- Check the helmet stays centered.
Final execution cue
A concern means pause, correct, verify, stop, or escalate according to the rule already established above.
- CPSC — Bicycle Helmets Business Guidance
- CPSC — Which Helmet for Which Activity?
- CPSC — Replace Helmets When Needed
- Bell Helmets — How to Fit Your Bike Helmet
- SHOEI — User Manuals
- Lally et al. — Modelling Habit Formation in the Real World
- Wieber et al. — Implementation Intentions and Action
- MedlinePlus — Breathing Difficulties: First Aid
- MedlinePlus — Numbness and Tingling