
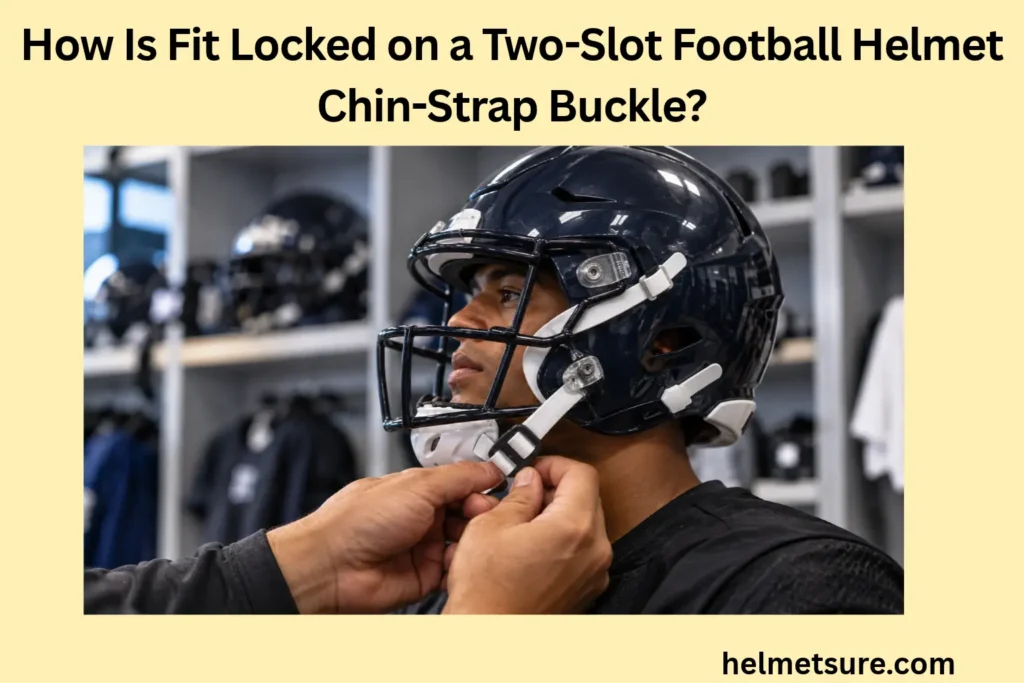
How Is Fit Locked on a Two-Slot Football Helmet Chin-Strap Buckle?
A two-slot Xenith-style football chin-strap buckle locks the chosen fit when the strap is adjusted, verified, and the free end is fed through the buckle’s second slot; the snap fastens the strap but does not lock that adjustment.
This procedure applies only to a relevant two-slot/Xenith-style snap-buckle system whose current manufacturer instructions specify the second-slot locking method. Other chin-strap systems may use different hardware and routing. Stop and obtain manufacturer or qualified-equipment guidance if the strap or buckle is damaged, deformed, or nonfunctional.
The order is essential. Establish the strap length and buckle position first, check the fitted state while the buckles are snapped, complete the second-slot pass, and then confirm that locking did not change the fit.
Snapping the Buckle to the Helmet Is Not the Same as Locking the Strap Adjustment
Snapping the buckle attaches the chin strap to the helmet, while the later second-slot pass locks the selected strap adjustment.
These actions occur at different points in the fitting sequence. The buckle is positioned on the webbing and snapped to the helmet while the fit remains adjustable. After the chin cup, slack, buckle position, and overall fitted state have been checked, the free strap end is routed through the second slot to retain the selected setting.
How the snap buckle fastens the chin strap to the helmet
The snap buckle fastens the fitted chin strap to the helmet shell connection point but does not complete the strap-adjustment lock.
During fitting, the buckle is moved to the required position on the strap and pressed onto its helmet snap. That connection attaches the buckle hardware to the helmet. It allows the fitted strap system to be checked with the buckle in its working attachment position.
The webbing adjustment still has a separate retention step. Xenith’s current Epic+ sequence instructs the fitter to adjust and snap the buckles, check the fit, and only then feed the strap ends through the second slots. A snapped buckle is therefore fastened, but its chosen strap setting is not yet fit-locked.
How locking the strap adjustment secures the chosen buckle position
Locking the strap adjustment retains the buckle position selected during fitting by completing the manufacturer’s second-slot routing step.
Once the buckle position and fitted strap length have been approved, the free webbing end is fed through the buckle’s second slot. This additional pass places the strap in the routing state Xenith identifies as locking the fit. Its purpose is to retain the setting already established, not to create a new setting.
The buckle can already be snapped when this occurs. Snap engagement and webbing retention work together in the completed system, but they remain different functions: one attaches the buckle to the helmet, while the other retains the adjusted strap position.
Why a snapped buckle can still have an unsecured strap adjustment
A buckle can be snapped to the helmet while its selected webbing adjustment remains unsecured through the second slot.
This intermediate state exists after the buckle has been positioned and fastened but before the free strap end completes the locking pass. The strap may already feel fitted, yet it remains outside the manufacturer-specified second-slot retention path.
Do not automatically call this strap “loose,” because it may have the intended length and no unnecessary slack. The precise issue is that the fitted adjustment has not yet been locked. That distinction also explains the broader concern addressed in unsecured chin strap: visible snap engagement alone does not establish that every required securing step is complete.
Why the second-slot procedure applies only to the relevant two-slot/Xenith-style system
The second-slot procedure applies only where the current manufacturer specifies that two-slot buckle routing system.
Football helmet chin straps do not all share one buckle geometry, slot arrangement, or retention method. The instructions in this article follow current Xenith material that describes a first-slot adjustment route and a later second-slot locking pass. A different brand, buckle, replacement strap, or helmet model may require a different procedure.
Do not transfer these steps to hardware merely because it looks similar. Match the exact system to its current fitting or installation instructions. When a Xenith model is named, use that model’s guide rather than assuming every Xenith system is identical.
Fastened versus fit-locked comparison
| State | What has happened | What still must happen |
|---|---|---|
| Adjusted | Buckle position establishes the intended strap length | Verify the fitted state |
| Snapped | Buckle is fastened to the helmet | Complete the fit check and second-slot lock |
| Fit verified | Chin cup, slack, buckle position, and overall fit are acceptable | Feed the free end through the second slot |
| Fit-locked | Second-slot routing retains the selected adjustment | Verify that locking did not change fit or routing |
How the Strap Webbing Runs Through the Two-Slot Buckle Before Fit Is Locked
Before fit is locked, the webbing uses the buckle’s first-slot adjustment path while the free end remains available for the later second-slot pass.
This layout keeps the buckle adjustable while the fitted strap length is being established. It also creates a clear distinction between the first slot used during setup and the second slot used after fit verification. The exact entry and exit direction must follow the current manufacturer diagram for the hardware being fitted.
How the first buckle slot provides the adjustment-routing path
The first buckle slot carries the webbing during the adjustable stage before the retention pass is completed.
Xenith’s current chin-cup installation instructions direct the strap through only the first snap-buckle slot during setup. The X2 fitting guide describes the same first-slot-only state as making the chin straps easier to adjust during fitting.
In that state, the buckle can be positioned on the webbing before the final lock. Do not guess which face or side of the slot the strap should enter; where the manufacturer uses arrows or a diagram, that visual controls the exact orientation.
How the buckle moves along the webbing while the adjustment remains unlocked
While the adjustment remains unlocked, the buckle can slide along the webbing to change its fitted position.
Moving the buckle changes the effective length of the strap segment between the helmet attachment and the chin cup. This is intentional adjustment, not the unwanted slippage that would be investigated after locking.
The buckle should move only as the manufacturer’s fitting process requires. Do not force hardware that binds, deforms, or will not move normally. Incorrect routing or damaged components need separate evaluation rather than added pulling force.
Where the free strap end remains before the locking pass
Before locking, the free strap end remains available to be routed through the buckle’s second slot after fit is verified.
The free end is the webbing tail used to complete the second pass. Keeping it outside the locking slot preserves adjustability while the buckle position, chin-cup position, slack, and overall fit are still being evaluated.
No universal length of exposed strap tail is specified for this task. What matters is that the strap follows the current OEM setup path, remains adjustable until the fit checks pass, and can complete the documented second-slot route without improvisation.
How the second slot functions as the later retention path in this two-slot system
The second slot is the later routing path through which the strap end is fed to lock the verified fit.
The first slot supports adjustment during setup; the second slot is used after fitting to complete the locking route. Xenith’s current installation and model-fitting pages consistently place that second pass after the fit has been established and checked.
The second slot should not be treated as another version of the initial setup slot. Its documented job is to retain the already-selected adjustment. No friction coefficient, load capacity, or numerical retention force needs to be inferred from that functional instruction.
Two-slot buckle routing diagram
| Routing state | Webbing path and component labels | Functional result |
|---|---|---|
| Adjustable state | Strap webbing → first slot; buckle can be positioned; free strap end remains available | Fitted strap length can still be changed |
| Verified state | First-slot route remains in place; buckle is snapped; chin cup, slack, and fit are checked | Adjustment is ready to be locked |
| Locked state | Free strap end completes the manufacturer-specified second-slot pass | Selected adjustment enters its retention state |
Component labels: snap buckle; strap webbing; first slot—adjustment route; second slot—fit-locking route; free strap end; buckle-position movement in the unlocked state.
The table shows the sequence, not the physical entry direction. Match the actual route to the current OEM diagram for the exact buckle before threading it.
How to Adjust the Buckle Position to Set the Fitted Strap Length
Set the fitted strap length by sliding the buckle to the position that removes unnecessary slack while keeping the chin cup correctly positioned.
The adjustment stage establishes a candidate fit. It should produce a secure, comfortable strap state that follows the applicable model instructions without overtightening. Leave the free end outside the second locking slot until all pre-lock checks are complete.
How sliding the buckle changes the effective strap length
Sliding the buckle along the webbing changes the effective strap length between the helmet attachment and chin cup.
Move the buckle along the first-slot-routed strap to shorten or lengthen the fitted segment as required. The correct position is determined by the actual wearer, chin-cup position, strap condition, and current model instructions—not by a universal buckle location or distance.
Do not complete the second-slot pass while the buckle is still being positioned. Locking is meant to preserve a selected length, so that length must first be established and verified.
How removing unnecessary slack changes the buckle’s fitted position
Removing unnecessary strap slack moves the buckle toward the fitted position required for a secure adjustment.
If visible or felt slack remains in the fitted strap, reposition the buckle so the effective strap length better supports the intended chin-cup position. Xenith’s current Epic+ guidance pairs a secure fit with comfort and absence of slack; it does not direct the fitter to maximize tension.
Stop tightening when additional adjustment would create discomfort or displace the chin cup. No universal finger-width, force, or distance rule should replace the qualitative fit criteria in the current model guide.
How the adjusted strap should hold the chin cup in its intended position
The adjusted straps should hold the chin cup in the intended fitted position before the buckle adjustment is locked.
Low and high strap adjustments work together to position the chin cup according to the relevant helmet guide. In Xenith’s current instructions, the straps are adjusted so the chin cup sits comfortably under the chin while unnecessary slack is removed.
If the chin cup is off-center, displaced, or changes position as the buckles are snapped, continue fitting rather than preserving the error through the second slot. Exact chin-cup geometry is model-dependent and should be checked against the correct manufacturer instructions.
Why the free strap end remains unlocked until the fitted position has been checked
Leave the free strap end out of the second-slot locking path until the selected fit has been checked.
This keeps the setting easy to revise while the buckle position, strap slack, chin cup, and overall helmet response are evaluated. Xenith’s fitting sequence places the fit check after the buckles are adjusted and snapped but before the second-slot locking step.
Routing the free end through the second slot too early does not necessarily damage anything, but it can force the fitter to reopen the route when further adjustment is needed. Fit first, verify second, and lock only after the setting no longer needs correction.
How to Verify the Fit Before Securing the Strap Adjustment
Before locking the adjustment, verify chin-cup position, slack, buckle position, and the complete fitted state while the buckles are snapped.
This is the pre-lock quality gate. It decides whether the temporary fitted state is ready to be retained. It does not prove that the later second-slot pass was completed correctly; that requires a separate post-lock check.
Confirm that the chin cup is positioned correctly before locking
Confirm that the chin cup remains in the correct fitted position before feeding the strap ends through the second slots.
Use the current model guide to check how the high and low straps position the chin cup. The cup should remain in its intended wearer-specific location while the snapped straps feel secure and comfortable. If it shifts or sits incorrectly, readjust the straps and buckle positions before locking.
Comfort is part of this evaluation, but it is not a reason to leave unnecessary slack. The guide to comfortable strap fit addresses that narrower balance between a secure strap state and wearer discomfort.
Confirm that unnecessary slack has been removed from the adjusted strap
Confirm that unnecessary strap slack has been removed without creating discomfort before the adjustment is locked.
Check each adjusted strap while its buckle is snapped. Obvious slack indicates that the buckle position or effective strap length may still need correction. A secure and comfortable state can proceed to the next check; discomfort or displaced fit indicates that adjustment should continue.
Do not convert “no unnecessary slack” into a maximum-tightness instruction. Current Xenith fitting guidance uses qualitative fit language and does not provide a universal tension or slack measurement for this procedure.
Confirm that the buckle sits at the intended fitted position
Confirm that each buckle remains at the position selected during strap-length adjustment.
Snapping the buckle and checking the helmet can disturb a position that was selected moments earlier. Compare the current buckle location with the intended setting and confirm that the effective strap length still produces the approved chin-cup and slack state.
If a buckle has shifted, restore its correct position before locking. Feeding the strap through the second slot would retain the wrong adjustment rather than repair it.
Confirm that the selected strap length is ready to be secured without further adjustment
Confirm that the complete fitted state no longer requires strap-length adjustment before beginning the second-slot locking pass.
Evaluate the chin cup, strap slack, buckle position, comfort, and the applicable manufacturer fit check as one pre-lock decision. Xenith’s current Epic+ and X2 instructions check helmet movement with the buckles snapped and direct the fitter to readjust if movement is excessive before the second-slot lock.
Follow the exact current guide rather than inventing a movement threshold. The separate guide to post-snap movement check explains that pre-lock check in its dedicated context. If more adjustment is needed, keep the strap unlocked and correct it first.
Pre-lock fit checklist
- Confirm the chin cup is in the position specified by the applicable model guide.
- Check that unnecessary slack has been removed without creating discomfort.
- Confirm each buckle remains at its selected fitted position.
- Verify that no strap-length correction is still required.
- Perform the current model’s specified overall fit or movement check.
- Leave the free strap end outside the second slot until every pre-lock check passes.
How to Secure the Fitted Buckle Position Through the Second Slot
Secure the verified buckle position by feeding the free strap end through the buckle’s second slot without changing the selected adjustment.
This section performs the locking action only. The fitted length should already be correct. Hold the buckle steady, follow the verified OEM route, draw the webbing through the second slot, and finish with the strap aligned and the buckle in its original approved position.
Keep the verified buckle position unchanged before beginning the locking pass
Hold the verified buckle position unchanged as the free strap end is prepared for the second-slot pass.
Stabilize the buckle at the location approved during fitting. The second pass is meant to retain that setting, so it should not be used to compensate for an incorrect buckle position or remaining slack.
If the buckle moves before threading begins, restore the selected position and recheck the fitted state. Lock only the adjustment that has already passed verification.
Route the free strap end through the second buckle slot
Feed the free strap end through the buckle’s second slot to perform the manufacturer-directed fit-locking pass.
The strap should already be using the documented first-slot adjustment route. Guide its free end through the second slot exactly as the current Xenith visual shows. This is the action the manufacturer describes as locking the fit or locking the buckles in place.
Do not infer an entry side, exit side, or webbing turn from text alone if the buckle’s orientation is unclear. Pause and compare the actual hardware with the current OEM diagram before proceeding.
Pull the webbing through without shifting the chosen buckle position
Draw the webbing through the second slot while keeping the chosen buckle position and fitted strap length unchanged.
Complete the intended second-slot route while holding the buckle stable. The free end needs to pass through the retention slot, but the action should not become an additional tightening step after fit has already been approved.
If the buckle shifts or the chin-cup position changes as the webbing is drawn through, stop. Reopen the route, restore the verified adjustment, check it again, and then repeat the locking pass.
Leave the strap correctly aligned after the second routing pass is complete
Finish the second routing pass with the webbing lying in the intended path without a new twist, fold, or displaced buckle.
Inspect the strap where it passes through both slots. The webbing should match the manufacturer’s route and lie in a clean, aligned state. Correct slot use and correct alignment must coexist.
The mere presence of the strap in the second slot is not sufficient if the webbing is twisted, folded, reversed relative to the OEM visual, or holding the buckle in a changed position. Correct the route before accepting the locked state.
How the Second Routing Pass Retains the Chosen Strap Adjustment
The second routing pass places the webbing into the buckle’s manufacturer-designated retention path so the selected adjustment is held rather than left freely adjustable.
The supported explanation is functional and qualitative. Adding the second path changes the webbing’s route through the buckle and helps resist unintended adjustment movement. The manufacturer documentation establishes that this route locks the fit; it does not supply a friction coefficient, clamping force, or load rating for this fitting explanation.
How the second routing pass redirects the webbing through the retention path
The second pass redirects the free strap end through the additional buckle slot that the manufacturer uses to lock the fit.
Before locking, the strap follows the first-slot adjustment path and the free end remains available. After fit verification, the free end passes through the additional slot, changing the route from the adjustable setup state to the completed two-slot retention state.
This visible routing change is enough to explain the mechanism at the level supported by the OEM guide. There is no need to invent hidden buckle features or laboratory performance values.
How the redirected webbing path increases resistance to unintended strap movement
The completed second-slot path functions to resist unintended adjustment movement by placing the webbing in the buckle’s locked routing state.
The added routing constraint makes the fitted setting less free to change than it was in the first-slot-only adjustment state. This qualitative resistance is the practical meaning of the manufacturer’s instruction to lock the fit.
Do not convert that function into a measured claim. The fitting sources do not state a friction increase, strap-load capacity, or acceptable slippage value, and none is needed to follow the documented procedure.
How reduced unintended movement helps the buckle stay at the chosen adjustment
Reducing unintended webbing movement helps the buckle remain at the position selected during fitting.
Stable webbing routing supports stable buckle position, which in turn helps preserve the effective strap length and chin-cup state approved before locking. The intended result is retention of the selected fit, not a claim that the buckle can never move under any condition.
If the buckle position changes after the second pass, the desired result has not been verified. Check the routing and adjustment rather than assuming that any second-slot route must be correct.
Why the snap connection alone does not perform this strap-retention job
The snap connection fastens the buckle to the helmet, while the second-slot webbing path performs the separate fit-locking function.
Snap engagement controls the buckle-to-helmet attachment. The second-slot route controls retention of the selected webbing adjustment. Both are required in the completed fitted system described by the current Xenith procedure, but one cannot be substituted for the other.
This returns to the central distinction without changing it: a buckle may be snapped before the strap adjustment is locked, and the strap may use the second-slot route only after the buckle position and fit have been verified.
Retention mechanism chain
First-slot adjustable state → fitted buckle position → fit verification → second-slot routing → locked routing state → chosen adjustment retained
This chain describes the documented function qualitatively. It does not assign a friction coefficient, load value, or quantified slippage limit to the buckle.
How to Verify That the Locked Adjustment Still Matches the Chosen Fit
After locking, verify that the buckle position, second-slot routing, webbing alignment, slack state, and chin-cup position still match the fit approved before locking.
This is not a second attempt to establish fit from scratch. It compares the locked result with the verified pre-lock state. Correct routing alone is insufficient if the locking action changed the wearer-specific adjustment.
Confirm that the buckle remains at the position selected before locking
Confirm that the buckle remains at the same fitted position selected and verified before the locking pass.
Compare the post-lock buckle location with the position approved before the free end entered the second slot. An unchanged position indicates that the selected effective strap length was preserved during routing.
If the buckle moved, do not accept the new location merely because the second pass is complete. Reopen the lock, restore the fitted position, repeat the pre-lock check, and relock.
Confirm that the free strap end remains correctly routed through the locking slot
Confirm that the free strap end remains fully routed through the second-slot locking path specified for the system.
Inspect the completed path against the current OEM visual for the exact buckle. The strap should use the first-slot setup route and the second-slot locking route in the documented sequence.
Incomplete, reversed, or uncertain routing requires correction. Do not rely on memory when slot geometry is ambiguous; the manufacturer diagram is the controlling reference for the physical direction.
Check that the webbing has not twisted or folded during the locking pass
Check that the webbing remains aligned rather than twisted or folded through the buckle after locking.
Follow the strap through the visible buckle path and look for a twist, fold, doubled edge, or other misalignment introduced during the second pass. Flat, correctly directed webbing is a separate verification point from buckle position.
If the strap length remains correct but the webbing is misaligned, reopen enough of the route to flatten and rethread it. Avoid changing an otherwise-correct fitted length unless the correction also disturbed the buckle position.
Check that no new slack appeared after the adjustment was secured
Check that the locking pass did not introduce new slack into the previously verified strap adjustment.
Compare the strap state before and after locking. New slack suggests that the buckle shifted, the effective strap length changed, or the webbing did not settle into the intended route.
Do not simply pull harder on the loose tail. First identify whether the buckle position or routing changed, then reopen and restore the fitted state. No universal numerical allowance can replace this before-and-after comparison.
Confirm that the chin cup remains in the same verified fitted position
Confirm that the chin cup remains in the fitted position approved before the second-slot locking pass.
The chin cup is the wearer-facing outcome of the strap-length relationship. If it remains in the same intended position and the buckle, routing, alignment, and slack checks also pass, the lock has preserved the approved fit.
If the cup shifts, do not push it back into place while leaving the altered strap lengths locked. Reopen the adjustment, refit the straps, verify the corrected state, and repeat the second-slot pass.
Post-lock verification checklist
- Confirm each buckle remains at its pre-lock fitted position.
- Verify the free end follows the current manufacturer’s second-slot path.
- Check that the webbing lies flat without a twist or fold.
- Check that no new slack appeared during locking.
- Confirm the chin cup remains in the same verified fitted position.
- Reopen the adjustment if any post-lock check fails.
What Incorrect Strap Locking Looks Like and How to Identify the Cause
Incorrect strap locking appears as slippage, buckle-position change, new slack, twisted webbing, or a chin-cup shift that can be traced to a local adjustment or routing error.
Start with the most direct local explanation and compare the strap with the documented correct state. Do not label every problem a defective buckle. If routing and adjustment are verified but a problem persists—or the hardware is visibly damaged—stop and obtain current manufacturer or qualified-equipment guidance.
Strap adjustment slips → locking pass is incomplete or misrouted → reroute the free end correctly
If the selected adjustment slips, first check whether the second-slot locking pass is incomplete or misrouted.
Compare the actual webbing path with the current OEM diagram. A missing or incorrect second pass can leave the adjustment outside its intended retention state. Reopen the route, preserve or restore the correct first-slot setup, and feed the free end through the proper second-slot path.
If the documented route is correct and the adjustment still slips, do not declare or repair an assumed hardware defect yourself. Persistent unexplained retention failure requires manufacturer guidance or qualified equipment evaluation.
Buckle position changes during locking → adjustment moved during the second pass → restore the verified position and relock
If the buckle moves while the free end is routed, restore the previously verified buckle position before relocking.
The shift changes effective strap length, so the locked state no longer represents the fit approved earlier. Remove the free end from the second-slot path, return the buckle to its adjustable state, and restore the correct wearer-specific position.
Repeat the pre-lock fit check before routing the free end again. Do not preserve the shifted position unless a complete refit shows that it is actually the correct one.
New slack appears after locking → fitted strap length was disturbed → reset the adjustment before securing it again
New slack after locking indicates that the previously fitted strap length was disturbed and should be reset before relocking.
Reopen the locking path and check whether the buckle moved or the strap was routed incorrectly. Restore the effective length that produced the approved chin-cup and slack state, then repeat the pre-lock verification.
If the slack existed before locking, return to the original adjustment stage rather than diagnosing a lock failure. Correct the cause instead of pulling the visible tail harder and potentially moving the buckle again.
Webbing twists through the buckle → strap entered the retention path incorrectly → flatten and reroute the webbing
Twisted webbing through the buckle indicates that the retention route should be reopened, flattened, and rerouted to the intended OEM path.
Remove the free end from the second-slot path far enough to release the twist. Align the webbing, confirm the documented slot route, and thread it again while keeping the buckle at the verified fitted position.
Do not tighten a twist deeper into the buckle. If the strap length was not disturbed, preserve that setting while correcting the routing error; if it changed, repeat the fitting checks before relocking.
Chin cup shifts after locking → the retained position no longer matches the pre-lock fit → reopen the adjustment and refit before relocking
A chin-cup shift after locking means the retained strap state no longer matches the fit verified before the locking pass.
Reopen the second-slot path and reassess the high and low strap lengths, buckle positions, and slack state. Refit until the chin cup returns to the position specified for the wearer and model, then repeat the complete pre-lock check.
Do not correct only by pushing the chin cup into place while the wrong strap lengths remain locked. The retained webbing state must support the verified chin-cup position.
Symptom, cause, and correction table
| Signal | Most direct local interpretation | Correction |
|---|---|---|
| Adjustment slips | Second-slot pass may be incomplete or misrouted | Verify the OEM route and reroute |
| Buckle moves during locking | Selected adjustment shifted during the second pass | Restore the verified position and relock |
| New slack appears | Effective strap length changed | Reset the fit before locking again |
| Webbing twists or folds | Retention route is misaligned | Flatten and reroute |
| Chin cup shifts | Retained strap state no longer matches the pre-lock fit | Reopen, refit, verify, and relock |
| Correct routing but problem persists | Cause is not established by routing alone | Stop and seek current OEM or qualified-equipment review |
How to Reopen, Readjust, and Secure the Strap Again
Correct a failed lock by reopening the second-slot retention path, restoring the adjustable state, refitting the buckle, and repeating both verification stages.
The recovery sequence reverses only the locking pass first. It does not require unrelated disassembly or an improvised hardware repair. Restore the documented first-slot state, correct the fit, verify it, relock it, and verify the retained result.
Remove the free strap end from the second-slot retention path
Remove the free strap end from the second-slot path to reopen an adjustment that failed post-lock verification.
Reverse the final retention pass so the buckle can return to an editable state. Leave correct first-slot routing and unrelated components in place unless the diagnosis shows that they are also wrong.
This is a fit correction, not full buckle disassembly. If the hardware cannot be reopened normally or shows damage, stop instead of forcing or modifying it.
Return the buckle to an adjustable state without changing the basic strap routing
Return the buckle to its adjustable first-slot state while preserving any routing that was already correct.
Confirm that the webbing remains in the manufacturer’s first-slot adjustment path and that the buckle can slide as intended. If the original setup path was wrong, correct it against the current OEM visual before fitting continues.
An adjustable state is not an improperly routed state. It is the documented configuration used to select buckle position before the second-slot retention pass.
Reset the buckle position and fitted strap length
Reset the buckle position until the intended fitted strap length is restored.
Slide the buckle to the wearer-specific position that supports the intended chin-cup placement, removes unnecessary slack, and remains comfortable under the current model instructions. If the original setting was itself wrong, do not recreate it merely because it was the previous position.
Treat the reset position as a new candidate fit. Do not proceed directly to locking; it must pass the same pre-lock checks as the original adjustment.
Repeat the pre-lock fit check before securing the adjustment again
Repeat the complete pre-lock fit check after readjustment rather than assuming the corrected position is ready to lock.
Recheck chin-cup position, unnecessary slack, buckle position, comfort, and the applicable manufacturer fit or movement check. A correction changes the fitted state, so an earlier verification does not validate the new setting.
If any criterion fails, continue adjusting. Only a newly verified fit is ready for another second-slot locking pass.
Reroute the free end through the locking slot and repeat post-lock verification
Reroute the free strap end through the second slot and repeat post-lock verification to confirm the corrected fit was retained.
Hold the newly verified buckle position, complete the OEM-specified second-slot route, and leave the webbing aligned. Then compare the locked result with the pre-lock state: buckle position, routing, slack, alignment, and chin-cup position should remain correct.
Do not repeat blind routing attempts indefinitely. If the verified route repeatedly fails to retain the adjustment, or the hardware does not operate normally, stop and refer the system to current manufacturer guidance or a qualified equipment professional.
Adjust → Verify Fit → Lock Adjustment → Verify Lock
The complete two-slot fitting sequence is adjust the buckle, verify the fit, route the free end through the second slot, and verify that the locked state preserved the selected adjustment.
This four-stage sequence keeps fastening, fitting, locking, and verification in their correct order. It also supplies a clear correction rule: if locking changes the fit, reopen the route and restart from the adjustment stage that needs repair.
Adjust the buckle until the intended strap length is established
Adjust the buckle until the intended wearer-specific strap length and chin-cup position are established.
Use the first-slot adjustable state to position the buckle, remove unnecessary slack, and support the chin cup in the location specified by the current model guide. This is a candidate fitted state, not the final lock.
Verify the chin cup, slack, buckle position, and fitted length before locking
Verify chin-cup position, slack, buckle position, and fitted strap length before committing the adjustment to the locking path.
Confirm that the wearer-specific fit is secure and comfortable, the buckle has not shifted, and the applicable manufacturer fit check does not indicate further adjustment. If any check fails, return to adjustment rather than locking the error.
Route the free strap end through the second slot to secure the adjustment
Route the free strap end through the second slot to place the verified adjustment in its locked routing state.
Follow the exact OEM path while preserving the selected buckle position and strap length. This step applies only to the documented two-slot/Xenith-style system and should not be generalized to unrelated chin-strap hardware.
Verify that the retained position, routing, slack state, and strap alignment remain correct
Verify after locking that buckle position, second-slot routing, slack state, webbing alignment, and chin-cup fit remain correct.
Compare the result with the fit approved before locking. If every variable remains correct, the selected adjustment has been successfully retained. If any variable changed, reopen the second-slot path, correct the fit or routing, and repeat both verification stages.
Final sequence strip
Adjust → Verify Fit → Lock Adjustment → Verify Lock
- Adjust: Establish buckle position, fitted strap length, and chin-cup position.
- Verify Fit: Confirm chin cup, slack, buckle position, comfort, and the applicable movement check.
- Lock Adjustment: Feed the free strap end through the second slot without changing the fit.
- Verify Lock: Confirm the retained position, route, slack state, webbing alignment, and chin-cup position.
For the relevant two-slot system, first adjust and verify the fit; then route the free strap end through the second slot and confirm that the lock did not change buckle position, slack, alignment, or chin-cup fit.
Frequently Asked Questions
Short answers about the two-slot fit-locking sequence.
Does snapping the buckle lock the strap adjustment?
No. The snap attaches the buckle; the documented second-slot pass retains the chosen adjustment.
Should the second-slot pass be completed before fit is checked?
No. Adjust and verify the fitted state first, then lock it without changing the buckle position.
Can this method be used on every football chin strap?
No. It applies only to a relevant two-slot system whose current manufacturer instructions specify this route.
What if the webbing twists during locking?
Reopen the route, flatten the webbing, restore the verified position, and repeat both checks.
What confirms a successful lock?
The buckle position, second-slot routing, slack state, webbing alignment, and chin-cup fit remain correct.
Sources
Manufacturer instructions used for this procedure.