
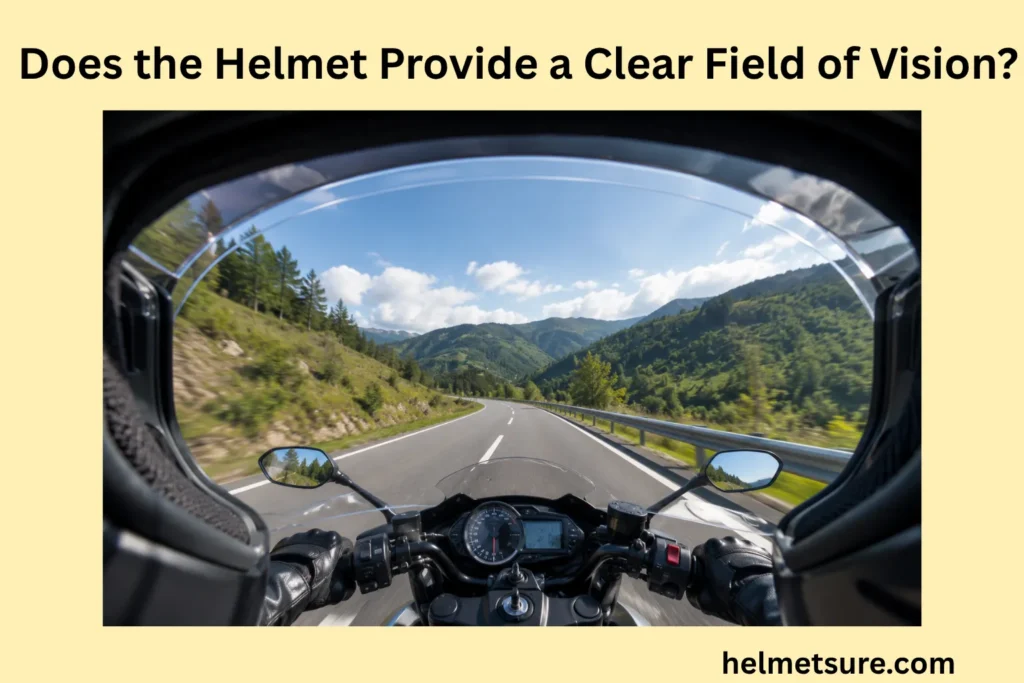
Does the Helmet Provide a Clear Field of Vision?
A helmet provides a clear field of vision when its correctly aligned eye opening preserves activity-relevant forward, peripheral, downward, and upper sightlines without unacceptable obstruction from the shell, visor, goggles, or required accessories.
Judge usable vision with the exact helmet correctly fitted and configured, not from eye-port width or product photos. A complete evaluation separates physical sightline geometry from visor or lens clarity, matches each visual zone to the intended activity, and repeats the test with every required accessory installed.
A Clear Helmet Field of Vision Means More Than Seeing Straight Ahead
A usable helmet field of vision includes forward, peripheral, downward, and context-dependent upper sightlines rather than straight-ahead vision alone.
Physical sightlines describe what can be seen through or around the helmet’s structure. Optical clarity describes the quality of the image passing through a visor, lens, eyewear, or goggles. Both must be acceptable, but they answer different questions.
Why forward visibility is only one part of helmet field of vision
Forward visibility shows what lies directly ahead, but it does not represent the full visual area available through and around the helmet.
A clear central opening can still coexist with shell edges, cheek structures, goggles, or padding that intrude at the sides. The brow, peak, chin bar, or lower edge can also limit upper or near-field access even when the distant forward view appears open.
How peripheral vision supports awareness beyond the direct sightline
Peripheral vision provides visual access to areas beside the direct sightline and can be particularly relevant when surrounding movement or hazards matter.
Check the left and right boundaries without turning the head far enough to hide the helmet’s effect. Identify whether the eye-port edge, side shell, padding, goggle frame, or another component enters the lateral visual area.
Why downward visibility matters when checking terrain, controls, or foot position
Downward visibility matters when the activity requires the wearer to see nearby terrain, equipment controls, board or skate position, or other near-field information.
The relevant targets differ by use. Technical terrain can make nearby surface changes important, while a rider may need visual access to controls or equipment. A skater may need to confirm near-field position without forcing an extreme head or neck movement.
Why helmet coverage and field of vision should be evaluated as separate attributes
Compare helmet head coverage with sightlines without treating the two as opposite ends of one scale. A helmet can enclose more anatomy while preserving a well-positioned opening, and a more open design can still obstruct vision if it fits or aligns poorly.
Record what protective structure surrounds, then record what the wearer can see. Neither result establishes impact attenuation, certification, optical clarity, or complete helmet suitability on its own.
Visual zones and inspection targets
| Visual Zone | What to Check |
|---|---|
| Forward | Clear central sightline |
| Left peripheral | Helmet/goggle edge obstruction |
| Right peripheral | Helmet/goggle edge obstruction |
| Downward | Lower shell, chin bar, controls/terrain view |
| Upper | Brow, peak, visor, shell edge |
Which Visual Areas Should Remain Clear When You Wear the Helmet?
Inspect the helmet’s forward, left, right, downward, and upper visual boundaries while it is worn in its correct position.
Use a consistent sequence and realistic posture. Keep the helmet aligned according to its instructions, identify the source of every restriction, and distinguish natural human visual limits from obstruction created by the helmet or attached equipment.
How to check whether the helmet opening preserves a clear forward sightline
The helmet opening should preserve the forward sightline required by the activity when the helmet sits in its intended position.
Look naturally ahead rather than tilting the helmet or changing posture to produce a better view. Check whether the brow, shell edge, visor, peak, chin structure, padding, goggles, or eyewear enters the important central zone.
How to identify restrictions at the left and right edges of peripheral vision
Peripheral restrictions appear when shell, padding, goggles, or other structures intrude into the left or right lateral visual zones.
Keep the head neutral and compare both sides. Note the first visible helmet or equipment boundary and whether one side is more restricted, which can reveal asymmetric fit, shifted padding, uneven goggle placement, or an accessory problem.
How to test whether the lower helmet edge blocks downward sightlines
Test downward visibility from a realistic posture to determine whether the lower helmet edge or chin structure blocks activity-relevant near-field sightlines.
Adopt the head and body position normally used for the activity, then look toward representative near-field targets without extreme neck flexion. Identify whether an opaque structural edge, padding, chin bar, or equipment frame causes the limitation.
Separate geometric obstruction from lens quality. A clear visor cannot remove an opaque shell edge, while replacing a shell design will not correct distortion or fogging in the optical surface.
How to identify upper-edge obstruction when the rider changes head position
Upper-edge obstruction should be checked by changing head position within the normal range used for the activity and observing whether the brow, peak, or shell blocks important sightlines.
Test the normal upright, forward-leaning, and other relevant postures rather than one showroom pose. A peak can provide useful shading in one position yet enter the forward or upper zone in another.
A visible brim is not automatically a problem. The threshold is whether its documented or adjusted position materially blocks a sightline required for the activity while the helmet otherwise remains correctly fitted.
How Should Helmet Field of Vision Match the Intended Activity?
Helmet visibility requirements should follow the visual demands of the intended activity rather than the helmet’s appearance.
Start with the environment and task: distant forward information, lateral movement, nearby terrain, controls, equipment position, and posture. Then compare only helmets whose category, certification, and manufacturer guidance support that use.[2]
Why commuting and road riding increase the importance of peripheral awareness
Commuting and road riding increase the importance of usable peripheral sightlines because surrounding traffic and movement can occur outside the direct forward view.
Test both lateral zones with the helmet correctly positioned and any eyewear installed. The eye-port, side shell, visor mechanism, padding, and glasses should not create a significant helmet-induced restriction in the visual area needed for the road environment.
Usable peripheral access does not guarantee that the wearer will detect traffic or another hazard. Attention, lighting, relative speed, obstructions, and human perception still influence what is noticed.
How skatepark and technical riding increase the value of downward and near-field visibility
Skatepark and technical riding can increase the value of downward and near-field visibility because nearby terrain, transitions, obstacles, or equipment position may require visual access.
Check the lower edge from the posture used on ramps, bowls, trails, features, or other relevant terrain. Include goggles, chin structures, and protective eyewear because they can change a view that seemed adequate with the bare helmet.
This does not mean the wearer should stare downward continuously or that one opening fits every technical discipline. It means near-field access deserves its own test when the activity makes that information relevant.
Why downhill or higher-speed riding makes unobstructed forward sightlines more critical
Downhill or higher-speed riding raises the practical importance of unobstructed forward sightlines because the wearer must process upcoming terrain over a changing distance and time window.
Evaluate the central and upper-forward zones in the actual riding posture, then ensure the helmet stays aligned during normal head movement. A brow, peak, visor edge, or shifted helmet should not intermittently enter the required view.
How changing terrain increases the need to scan beyond a fixed forward view
Changing terrain increases the need for usable visual access across multiple directions because relevant information can move between distant, lateral, and near-field zones.
A practical scan moves among forward, side, lower, and sometimes upper regions while the head follows a normal range of motion. The helmet should remain stable, and its boundaries should not produce a new obstruction each time posture changes.
Normal head movement remains part of environmental scanning. The test should identify whether the helmet forces excessive compensatory movement merely to work around a blind spot created by its geometry.
Why visibility requirements should follow the activity rather than helmet appearance
Use the helmet’s documented intended use to define the correct visibility context. Match the exact model, activity, category, market, and required equipment rather than judging an “open,” “full-face,” “trail,” or “race” silhouette.[3][4]
Appearance can suggest what to inspect, but it cannot prove adequate sightlines, certification, optical quality, or fit. Direct testing and primary documentation must resolve the decision.
Activity-specific visual priorities
| Activity Context | Forward Priority | Peripheral Priority | Downward Priority | Main Verification |
|---|---|---|---|---|
| Road / commuting | High | High | Moderate | Side sightlines + correct fit |
| Recreational skating | High | Moderate | Moderate | Stable opening + surroundings |
| Skatepark / technical | High | Moderate | High | Near-field + dynamic position |
| Downhill / faster technical use | Very high | High | High | Complete eye-port + goggles/accessories |
How Can Helmet Shape and Coverage Restrict Your Sightlines?
Helmet sightlines can be restricted when the eye opening, side structures, lower shell, chin bar, brow, or other protective geometry intrudes into required visual zones.
Geometry must be evaluated on the wearer because eye position, head shape, size, padding contact, and helmet position determine where a fixed opening sits. Test the exact helmet before deciding whether its design is restrictive.
How a narrow eye opening can reduce lateral sightlines
A narrow eye opening can reduce usable lateral sightlines when its side boundaries enter the wearer’s peripheral visual field.
The effect depends on more than measured width. Eye position inside the helmet, opening shape, side padding, goggles, and the distance between the face and boundary all affect the usable result.
How extended side structures can enter peripheral vision
Extended side structures can enter peripheral sightlines when protective shell or padding projects into the lateral visual zone.
Inspect both sides in the correct worn position, then repeat after normal head movement. Determine whether the visible boundary is protective shell, comfort padding, a goggle frame, or another component because the source determines the available correction.
Greater side coverage does not automatically create poor vision. Well-designed geometry can preserve lateral access, so the actual wearer test—not a coverage stereotype—must decide.
How lower helmet edges can interfere with downward visibility
Lower helmet edges can interfere with downward visibility when shell, padding, or facial structures enter the wearer’s near-field sightline.
A full-face chin bar, cheek structure, lower shell, or displaced padding can form the boundary. Test it from the activity posture and identify whether the restriction is fixed or changes with fit and adjustment.
An opaque structural obstruction is not an optical-lens problem. Keep the diagnosis precise so that cleaning a visor is not offered as a remedy for shell geometry and incorrect positioning is not used to hide a design limitation.
How full-face structures can alter sightlines around the chin and cheek areas
Full-face structures can change lower and lateral sightlines because the chin bar and cheek-area geometry add physical structure around the face opening.
The amount and location of change vary with eye-port shape, chin-bar height, cheek structure, padding, wearer anatomy, and product category. Evaluate the exact configuration, including a removable chin bar only in the manufacturer-approved position.
Full-face construction does not always restrict important sightlines, and an open helmet does not always provide adequate vision. Geometry, fit, optics, and activity requirements must agree.
Why more coverage should not automatically be treated as evidence of poor visibility
More helmet coverage should not automatically be treated as evidence of poor visibility because coverage extent and sightline geometry are separate design attributes.
Protective structure can extend around the head or face while a well-aligned opening preserves the necessary forward, peripheral, and lower zones. Conversely, a relatively open design can sit low, shift, or combine poorly with eyewear.
Compare coverage and visibility as complementary evidence. Do not use shell depth as a visibility score or assume that reducing structure necessarily creates a suitable visual result.
Helmet geometry and sightline restrictions
| Helmet Element | Possible Sightline Effect | Verify With |
|---|---|---|
| Narrow side opening | Peripheral restriction | Correct worn position |
| Brow / upper edge | Upper or forward obstruction | Natural head posture |
| Lower shell edge | Downward obstruction | Riding posture |
| Chin bar | Lower/lateral boundary change | Exact full-face setup |
| Padding | Eye-port alignment shift | Exact fit |
Does the Helmet Sit in the Right Position for a Clear Field of Vision?
Helmet position must align the eye opening with the wearer’s eyes because a fit problem can create visual obstruction even when the helmet’s design provides adequate sightlines.
Correct position is the baseline for every later test. Size, head-shape compatibility, final contact, and retention are separate fit variables; all must work together without altering the helmet outside manufacturer instructions.
How wearing the helmet too low can obstruct forward vision
A helmet worn too low can obstruct forward or upper-forward vision when its brow or shell edge sits below the intended eye-port position.
Follow the exact helmet fit instructions before rejecting the opening. Correct the fit system, padding configuration, or position only through manufacturer-approved adjustments and recheck the same forward zone.
If the required view is restored and the helmet remains stable, the obstruction was positional. If correct position cannot be maintained or the edge still blocks an important sightline, investigate size, head shape, or inherent geometry.
How wearing the helmet too far back can change the intended eye-port alignment
Wearing the helmet too far back can shift the eye-port away from its designed alignment and alter both sightlines and intended head coverage.
Backward rotation may create extra apparent space above the eyes while moving the front protective structure away from its intended position. It can also change strap geometry and allow further movement.
Why an oversized helmet can shift and intermittently block sightlines
An oversized helmet can move around the wearer’s head and intermittently shift the eye opening into required sightlines.
Excess space can allow dropping, rocking, or rotation during scanning and normal movement. A static showroom view may therefore look clear even though the brow or side edge repeatedly enters the visual area in use.
Do not choose a larger size for a larger-looking opening. Use the exact size chart, confirm internal-profile compatibility, and verify stable fit before evaluating the design.
How secure retention helps keep the eye opening aligned during movement
Secure retention helps keep the helmet’s eye opening aligned by limiting excessive movement after the helmet has been correctly fitted.
Adjust straps, buckle, and fit system according to the manufacturer’s sequence. The helmet should remain in its intended position during normal scanning without painful over-tightening or unauthorized changes.
A closed buckle alone is insufficient. The correct size, head shape, initial position, strap routing, and adjustment determine whether retention can stabilize the visual opening.
How to distinguish a fit problem from a genuinely restrictive helmet design
Distinguish a fit problem from restrictive design by correcting size, head-shape compatibility, position, and retention before reassessing the same sightlines.
Repeat the forward, lateral, lower, and upper checks after every valid correction. If the obstruction disappears, it was fit-induced; if it remains in the same activity-relevant zone, the fixed geometry may not suit the wearer or use.
Helmet position checklist
How Do the Visor and Lens Affect Helmet Visibility?
A visor or lens can reduce usable visibility even when physical helmet sightlines are adequate if its surface, optics, tint, contamination, or fogging interferes with the image reaching the wearer.
Evaluate the optical layer separately from the opening. Look through the exact visor, lens, goggles, or eyewear in expected lighting and climate, and follow product-specific cleaning, replacement, and use instructions.
How scratches and surface damage reduce visual clarity through a visor
Scratches and surface damage can reduce visor clarity by scattering or distorting light through the wearer’s sightline.
Inspect for scratches, haze, crazing, cracks, coating damage, contamination, and wear in the visual zone. Light sources and glare can reveal interference that is less obvious under even indoor illumination.
Connect current optical usability to helmet condition without inventing a universal scratch-depth rule. Materials and coatings differ, so follow the exact manufacturer’s inspection and replacement criteria.
Why optical distortion can make an otherwise wide sightline harder to use
Optical distortion can make a wide physical sightline harder to use when the visor or lens alters the apparent shape, location, or clarity of objects.
Look through different regions of the lens while the helmet remains correctly positioned. Apparent bending, warping, doubling, localized blur, or difficulty maintaining a clear image can indicate an optical issue that opening width cannot correct.
Do not infer an optical class from price, color, curvature, or marketing. Any regulated or product-specific optical claim requires the applicable standard and exact manufacturer documentation.
How tint can affect visibility as lighting conditions change
Visor or lens tint changes the amount and spectrum of light reaching the wearer, so suitability can change as ambient lighting changes.
A tint that manages bright conditions can reduce usable detail as light falls. Weather, shadows, tunnels, tree cover, time of day, and indoor-to-outdoor transitions can change the relevant environment without changing physical eye-port geometry.
How fogging can temporarily reduce usable field of vision
Fogging can temporarily reduce usable visibility when condensation forms across the visor, lens, eyewear, or goggle surface inside the required sightline.
Temperature difference, humidity, breathing, ventilation, moisture, speed, fit, and product design can influence condensation. Determine which surface fogs because a helmet visor, insert, glasses, and goggles may require different manufacturer-approved measures.
An anti-fog label is not a guarantee under every condition. Evaluate the system in expected climate and follow the specified ventilation, insert, coating, or care instructions without applying unapproved chemicals.
Why a wide visor opening does not compensate for poor optical clarity
Adequate visibility requires both usable geometry and a clear optical path. Scratches, haze, distortion, unsuitable tint, contamination, and condensation can compromise what reaches the wearer even when the opening exposes a broad visual area.
Do not average the two attributes into a visibility score. A physical opening and its installed optics must each pass their own evaluation in the intended configuration.
Optical visibility factors and verification
| Factor | Visibility Effect | Verify |
|---|---|---|
| Scratches / haze | Reduced clarity / glare potential | Current condition |
| Distortion | Warped or difficult visual interpretation | Exact visor specification |
| Tint | Changes light reaching eyes | Expected lighting + OEM rules |
| Fogging | Temporary obscuration | Climate + ventilation + anti-fog system |
| Wide opening | More physical sightline | Does not prove optical clarity |
Can Helmet Accessories Create New Blind Spots or Obstructions?
Helmet accessories can create new visual restrictions when goggles, peaks, cameras, lights, mounts, or other components enter the eye opening or shift the helmet’s position.
The helmet-alone result is only a baseline. Every item required for the activity must be installed together because otherwise compatible components can overlap, shift, or obstruct one another in the final setup.
How goggles can reduce peripheral vision around the edges of the helmet opening
Goggles can reduce usable peripheral vision when their frame, foam, or lens boundary sits inside the helmet’s available lateral sightline.
Compare the left and right limits with the helmet alone and then with the actual goggles. Check whether the frame covers usable eye-port area, whether foam changes helmet position, and whether the strap destabilizes the fit.
Physical insertion into the opening does not prove compatibility. The goggle-and-helmet combination must preserve relevant lateral, lower, upper, and optical visibility for the wearer.
When visor peaks or brims interfere with upward or forward sightlines
Visor peaks or brims become a visibility problem when their position blocks activity-relevant upward or forward sightlines in normal riding posture.
Test the peak in every manufacturer-approved adjustment position and with the head postures used for the activity. Compare useful shading with the amount of visual area removed.
Do not assume every peak is obstructive. A properly positioned design can stay outside required sightlines, while an incompatible or shifted peak can create a persistent boundary.
How mounted accessories can enter the rider’s visual field
Mounted accessories can enter the visual field when their body, arm, cable, light, camera, or bracket extends into a sightline or alters helmet position.
Inspect the accessory itself and its complete mounting path. A device outside the central view can still intrude peripherally, while a cable or bracket can shift padding, goggles, a visor, or the helmet.
A supported mounting point does not guarantee zero visual obstruction for every device size and configuration. Test the exact approved setup and avoid drilling, cutting, or modifying helmet structure.
Why accessory compatibility should be tested with the complete helmet setup
Accessory compatibility should be tested with the complete helmet setup because the interaction between helmet, goggles, visor, eyewear, mounts, and retention can change both visibility and fit.
Test helmet equipment compatibility with every required item installed at once. Repeat the visual-zone checks, confirm the visor can operate as intended, and verify that straps, frames, mounts, and cables do not displace the helmet.
When an accessory-related obstruction should be corrected before relying on the helmet
Accessory-related obstruction should be corrected before relying on the helmet when it removes an activity-relevant sightline or causes the helmet to sit outside its intended position.
Remove the component to confirm the source, then reposition it only as the manufacturer permits or select a documented compatible alternative. Retest the entire configuration after the change.
Convenience, recording value, lighting, or another feature does not compensate for a material blind spot. Required equipment that cannot be integrated without obstruction can make the helmet-and-accessory combination unsuitable.
Accessory obstruction checklist
How Can You Test the Helmet’s Field of Vision Before Buying or Riding?
Test helmet field of vision with the helmet correctly fitted, in realistic posture, and with every required visor, goggle, eyewear, or accessory installed.
How to test forward vision with the helmet in its correct worn position
Test forward vision only after the helmet is fitted and positioned according to the manufacturer’s instructions.
Confirm size, head-shape compatibility, stable contact, position, and retention. Adopt the normal head and body posture, look ahead without moving the helmet, and identify any brow, shell, visor, peak, goggle, or eyewear intrusion.
Do not reposition the helmet merely to pass. A view obtained outside the approved fit position is not evidence of usable visibility in the correct configuration.
How to check peripheral sightlines without rotating the head excessively
Check peripheral sightlines from a neutral or realistic head position so the test reveals helmet-induced lateral obstruction rather than compensation through excessive head rotation.
Check left and right independently, identify the visible boundary, and compare the helmet-alone result with the complete setup. Normal scanning is acceptable, but it should not erase the distinction between available peripheral access and a view achieved only after turning the entire head.
How to test downward visibility in a realistic riding posture
Test downward visibility in the posture normally used for the activity because helmet and body orientation change the practical near-field sightline.
Use representative stationary targets such as nearby terrain, controls, or equipment position. Look naturally downward and identify the first obstructing helmet or equipment edge without extreme neck flexion.
Repeat across the postures the activity genuinely requires. A test performed only while standing upright may miss a lower-edge problem that appears in a forward-leaning position.
How to repeat the visibility check with the visor, goggles, or required accessories installed
Repeat every relevant sightline check after installing the visor, goggles, eyewear, and other required accessories because the complete configuration determines usable visibility.
Start with a bare-helmet baseline, then assemble the exact intended system. Recheck forward, both lateral, downward, and upper zones; inspect optical clarity; and confirm that every component remains in the approved position.
Do not infer combined compatibility from separate tests. Frames, straps, mounts, cables, visors, and padding can overlap only when the full setup is assembled.
Why the helmet should remain stable while the rider scans in different directions
The helmet should remain stable while the wearer scans because movement of the helmet can move its eye-port boundaries into and out of the visual field.
Move the head normally through the directions and postures relevant to the activity while observing whether the brow, side edge, lower structure, visor, or goggles shift. Intermittent obstruction still matters even if the opening appears clear while motionless.
If movement changes the view, return to size, head shape, fit, and retention. A stable helmet preserves designed alignment; correct fit does not enlarge the physical eye port.
Field-of-vision verification test
What Should You Do If the Helmet Restricts Important Sightlines?
Important sightline restrictions should first be traced to fit, adjustment, visor, or accessory problems; persistent helmet-design obstruction should be treated as a suitability issue.
Diagnose one variable at a time. Establish correct size and position, evaluate the optical surface, remove accessory confounders, rebuild the required setup, and repeat the same activity-specific test before deciding.
When repositioning or adjustment can correct a sightline problem
Repositioning or adjustment can correct a sightline problem when the obstruction comes from incorrect helmet position rather than the helmet’s fixed geometry.
Confirm the correct size and internal profile, restore the manufacturer-specified position, adjust retention, and retest. If the edge moves out of the required zone while coverage and stability remain correct, the problem was positional.
Do not wear the helmet too high, too far back, or otherwise outside instructions to clear a sightline. An invalid visibility correction can create coverage and retention problems.
When an accessory should be removed or changed because it causes obstruction
An accessory should be removed, repositioned, or replaced when it creates a material activity-relevant visual obstruction that is absent without the accessory.
Compare identical sightlines with and without the component. If the restriction disappears, use a manufacturer-approved position or a documented compatible alternative and then repeat the full test.
Never cut, drill, compress, or remove safety-critical helmet structure to accommodate an accessory. If required equipment cannot coexist with the helmet, evaluate a different compatible setup.
When persistent peripheral restriction indicates that the helmet design may not suit the intended activity
Persistent peripheral restriction can make a helmet unsuitable when correct fit and configuration still leave insufficient lateral sightlines for the intended activity.
Confirm that the limit is helmet-induced, not merely the wearer’s natural visual boundary. Remove optional accessories, establish valid fit, reinstall required equipment, and check both sides again.
Why required head movement should not be used to dismiss a significant helmet-induced blind spot
Normal head movement is part of visual scanning, but excessive compensatory movement should not be used to dismiss a significant blind spot created by the helmet.
Separate ordinary scanning from movement performed solely to see around a shell, goggle, peak, or mount. Compensation can reveal information eventually, but it does not remove the original obstruction from the worn configuration.
“Turn your head more” is therefore not an adequate answer to a material activity-relevant blind spot. Correct the source or compare a better-suited helmet.
When unresolved visibility restrictions should lead to evaluating another suitable helmet
Evaluate another suitable helmet when important sightlines remain restricted after correct fitting, visor evaluation, accessory correction, and complete-setup testing.
Remove the candidate from the viable shortlist and compare another helmet intended and certified for the activity. Repeat the same visual-zone, optical, fit, accessory, and stability checks rather than assuming a different silhouette will pass.
Price, brand, reviews, warranty, style, or convenience cannot restore a missing sightline. The accurate conclusion is that the original configuration has not met the visibility requirement for that use.
Visibility restriction diagnosis and decision thresholds
| Restriction Source | First Action | Retest | Final Threshold |
|---|---|---|---|
| Incorrect position | Refit/reposition | Full sightline test | Persisting issue → design check |
| Wrong size/shape | Re-size / different internal profile | Full sightline test | Poor fit → reject fit |
| Goggles/accessory | Remove/change component | Full configuration test | Persistent required-setup issue → incompatibility |
| Scratched/fogged visor | Clean/replace/verify system | Optical check | Poor optics → resolve before use |
| Fixed helmet geometry | Confirm correct fit | Activity-specific test | Persistent important obstruction → evaluate another helmet |
How Do You Decide Whether the Helmet Provides Enough Field of Vision?
A helmet provides enough field of vision when required forward, peripheral, downward, and contextual sightlines remain usable with correct fit, clear optics, and the complete required equipment setup.
Confirm that forward, peripheral, and downward sightlines meet the demands of the activity
Confirm that forward, peripheral, and downward sightlines meet the actual visual demands of the intended activity before treating the helmet as suitable.
List the zones the activity requires, adopt representative postures, and check each zone independently. Include the upper sightline where the brow, peak, visor, or changing position can affect relevant visual access.
The helmet does not need an invented maximum score in every direction. It needs usable, activity-appropriate sightlines without unacceptable helmet-induced obstruction.
Verify that correct helmet positioning preserves the intended eye opening
Verify that correct fit and retention keep the helmet’s eye opening consistently aligned with the wearer’s eyes.
Confirm head-shape compatibility, candidate size, final contact, manufacturer-specified position, strap routing, and stable retention. Repeat the sightline test during normal head movement.
Do not pass a helmet that intermittently drops or rotates into vision. The opening must remain usable in the valid worn position, not only during a motionless snapshot.
Check that the visor or lens remains optically clear in expected conditions
Check that the visor or lens remains sufficiently clear for the expected lighting, temperature, humidity, and use conditions rather than evaluating it only indoors.
Inspect surface condition and distortion, match tint to verified rules and likely lighting, consider fogging, and include goggles or eyewear. Use only the product’s approved care and anti-fog methods.
Showroom clarity is not a promise of every environmental condition. The exact optical system must remain usable within its documented limits and expected use context.
Repeat the sightline test with required goggles or accessories installed
Repeat the complete sightline test with all required goggles, eyewear, visors, and accessories installed because the final configuration—not the bare helmet—determines usable vision.
Recheck forward, left, right, downward, and relevant upper zones; then confirm optical clarity and helmet stability. Compare the result with the baseline so every newly introduced obstruction has an identified source.
Physical attachment is not enough. Required components must work together without shifting the helmet or creating a material visual restriction.
Treat persistent helmet-induced blind spots as a suitability problem rather than a minor inconvenience
Persistent helmet-induced blind spots that affect activity-relevant sightlines should be treated as a suitability problem when correct fit and configuration cannot resolve them.
Confirm that the obstruction belongs to the helmet or required setup, persists after approved corrections, and affects a visual zone needed for the activity. Then evaluate a different suitable candidate instead of rationalizing the restriction through excessive head movement.
Once the helmet provides stable, activity-appropriate sightlines with the complete equipment setup, use the full helmet buying factors framework to evaluate the remaining protection, fit, condition, ownership, and purchase considerations.
Final field-of-vision checklist
Frequently Asked Questions About Helmet Field of Vision
These answers summarize the article’s sightline, activity, fit, optics, accessory, testing, transfer, and suitability boundaries.
Is forward visibility enough to judge a helmet?
No. Inspect forward, left and right peripheral, downward, and activity-relevant upper sightlines separately.
Does the CPSC 105° value apply to every helmet?
No. It is a U.S. bicycle-helmet requirement within that framework, not a universal threshold for every helmet category or market.
Can more head coverage automatically reduce vision?
No. Coverage extent and eye-port geometry are separate attributes; test the exact helmet in its correct position.
Can incorrect fit create a sightline problem?
Yes. A low, rotated, oversized, or unstable helmet can move the eye opening into important visual zones.
Does a wide visor opening guarantee clear vision?
No. Scratches, haze, distortion, tint, contamination, and fog can compromise the optical path independently.
Should accessories be tested one at a time?
Use individual checks to find the source, but the complete helmet, visor, goggles, eyewear, mounts, and retention setup must pass together.
Should visibility be tested while riding in traffic?
No. Begin with a safe, stationary, realistic-posture evaluation before relying on the setup in a hazardous environment.
What if an important blind spot remains after adjustment?
Treat it as a suitability problem for that wearer and activity, and evaluate another correctly certified, better-matched helmet.